New & Exciting

Sarah from LoveCrafts.com contacted me recently. Happily, I realised I could probably say yes to a craft related offer for the first time in yonks!

LoveCrafts.com were previously LoveKnitting and LoveCrochet but they’ve bought all together in one website. They’re on instagram too and their account is @lovecrafts.com Apparently they check out all posts which include #LoveCrafts and feature some on their page.

Sarah wrote:

We are currently celebrating all things free, including the thousands of Free Crochet Patterns on our site! We would love for you to join the party – pick out a pattern and we’d love to send you the yarn to give the pattern a go yourself and share this with your readers so they can get involved also.

Whoop! Free Yarn! And why not?

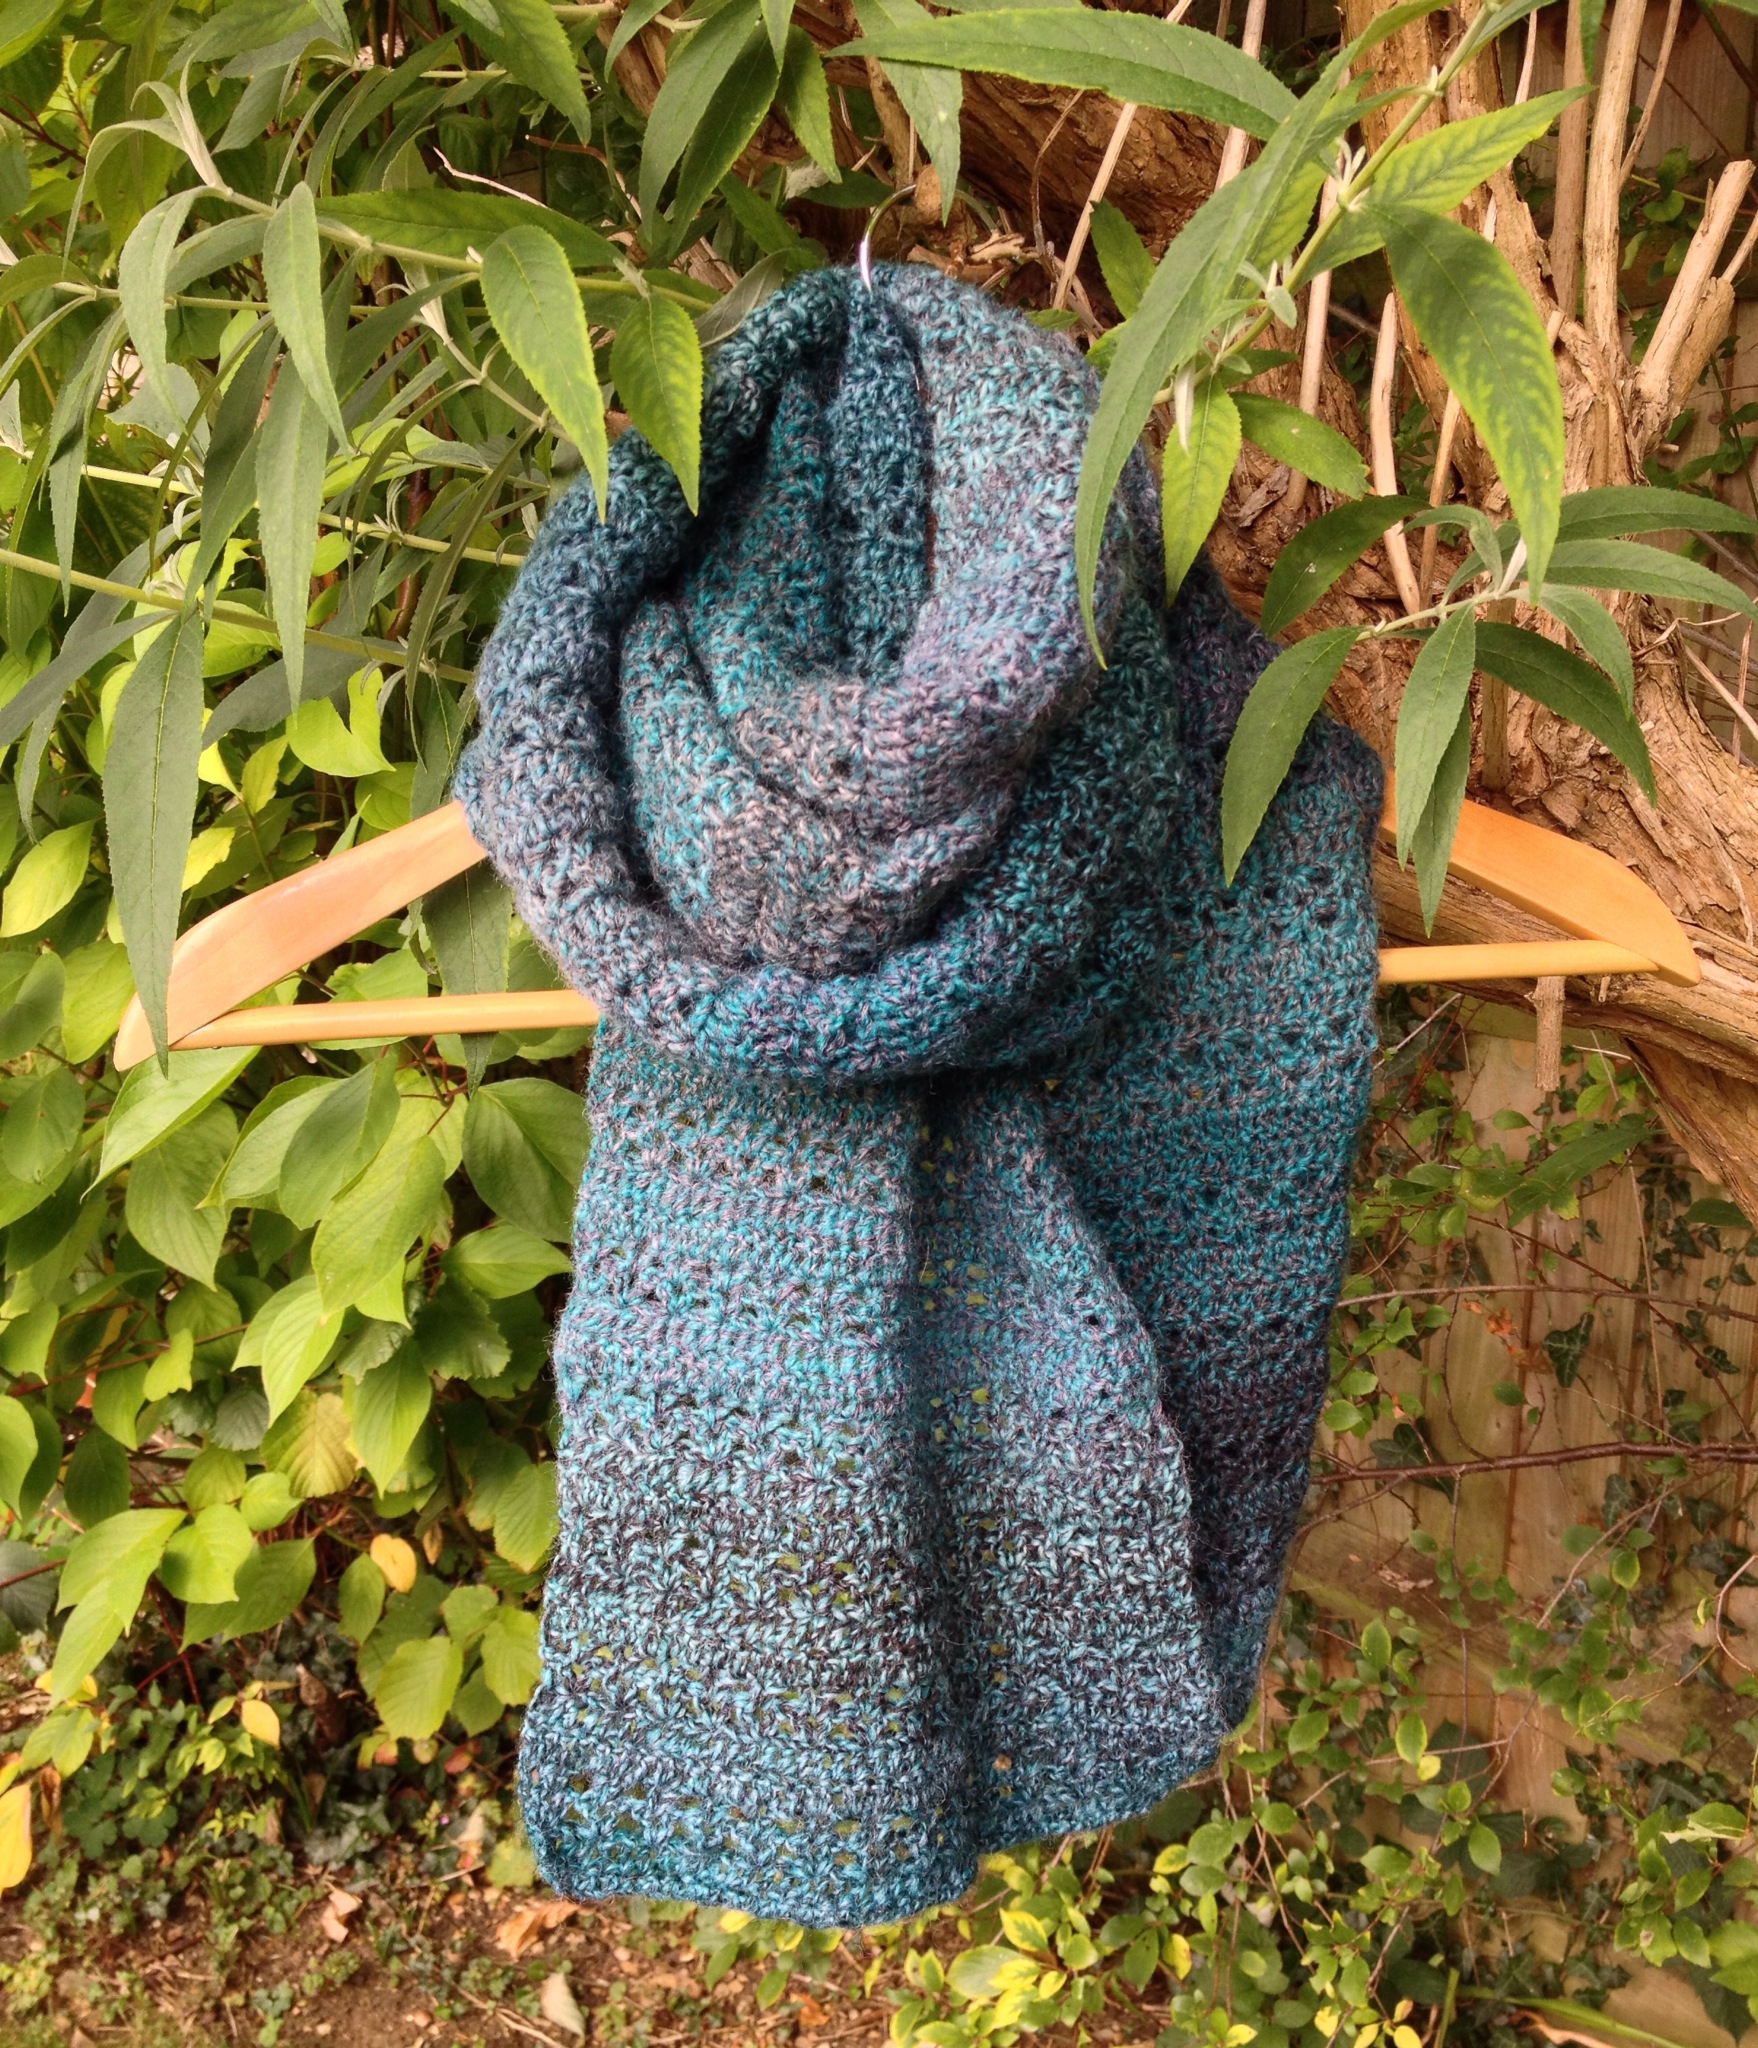
One of my favourite crochet peeps Emma of Lulu Loves uses Paintbox Yarns often. I’ve always thought how squishy and soft the thicker yarns look. This offer seemed like the perfect opportunity to try some myself.

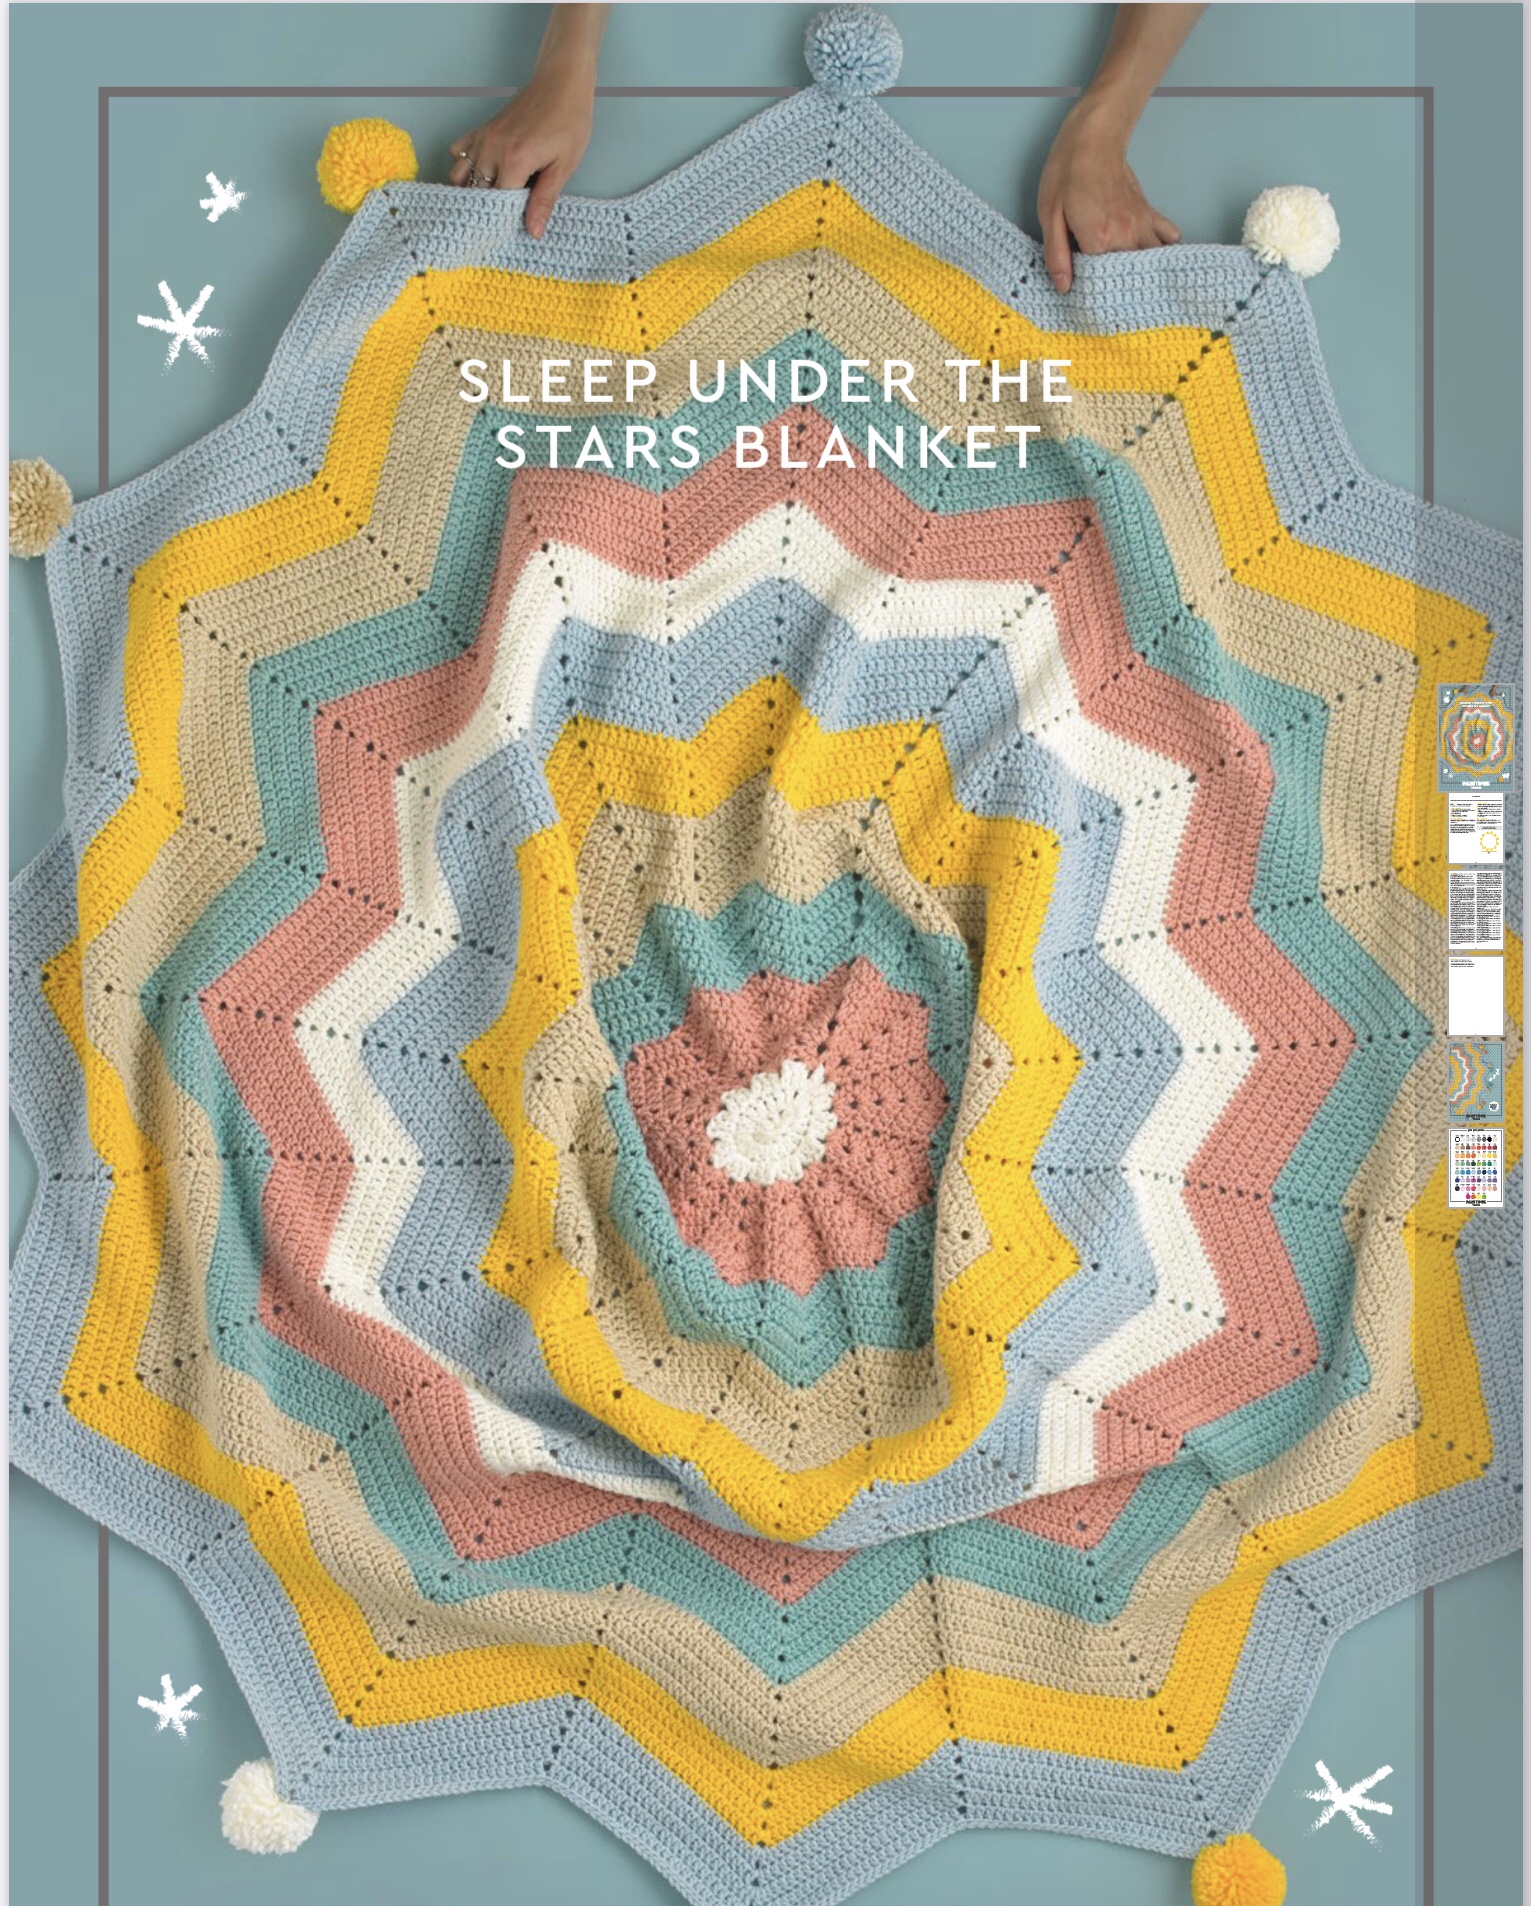
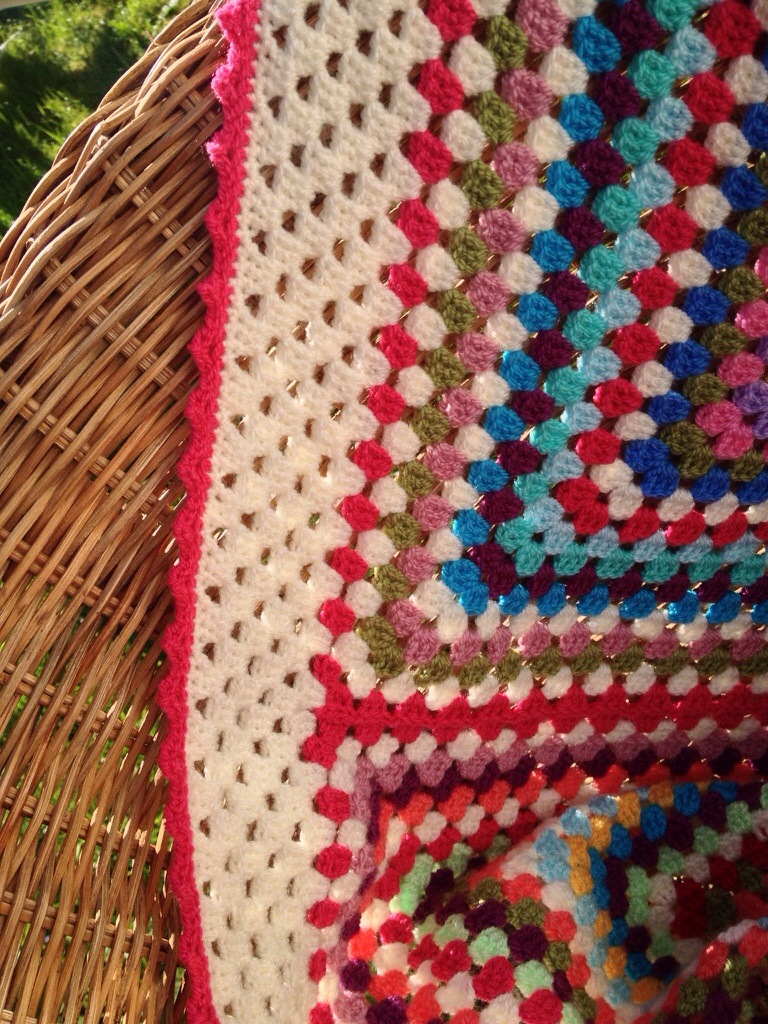
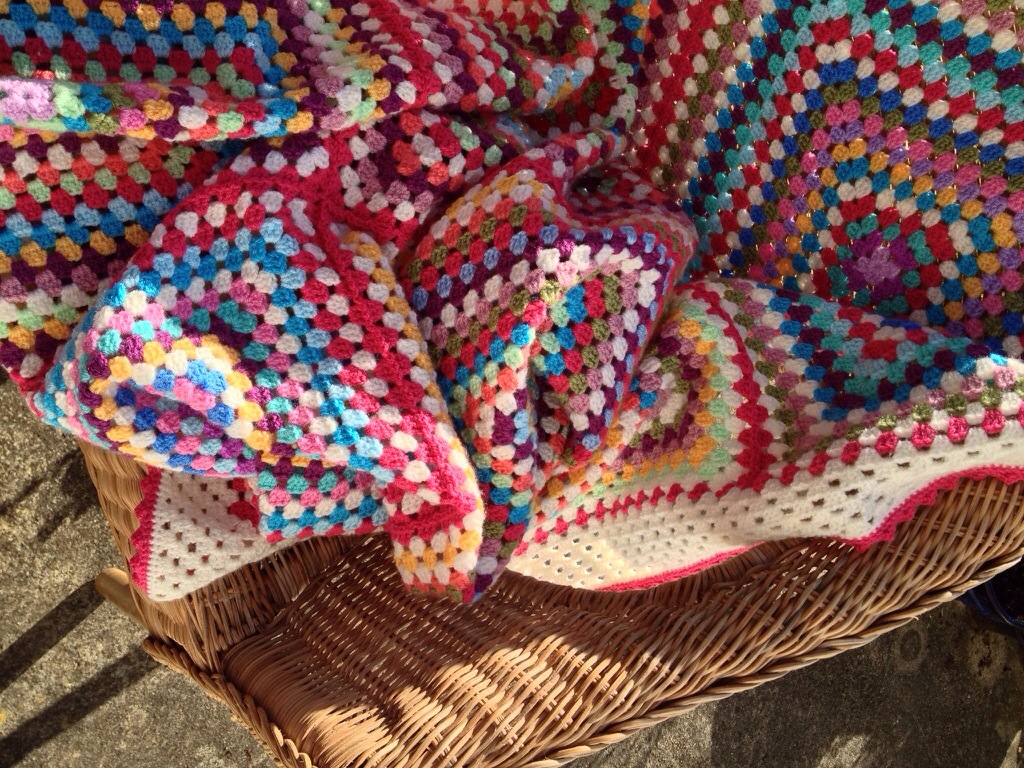
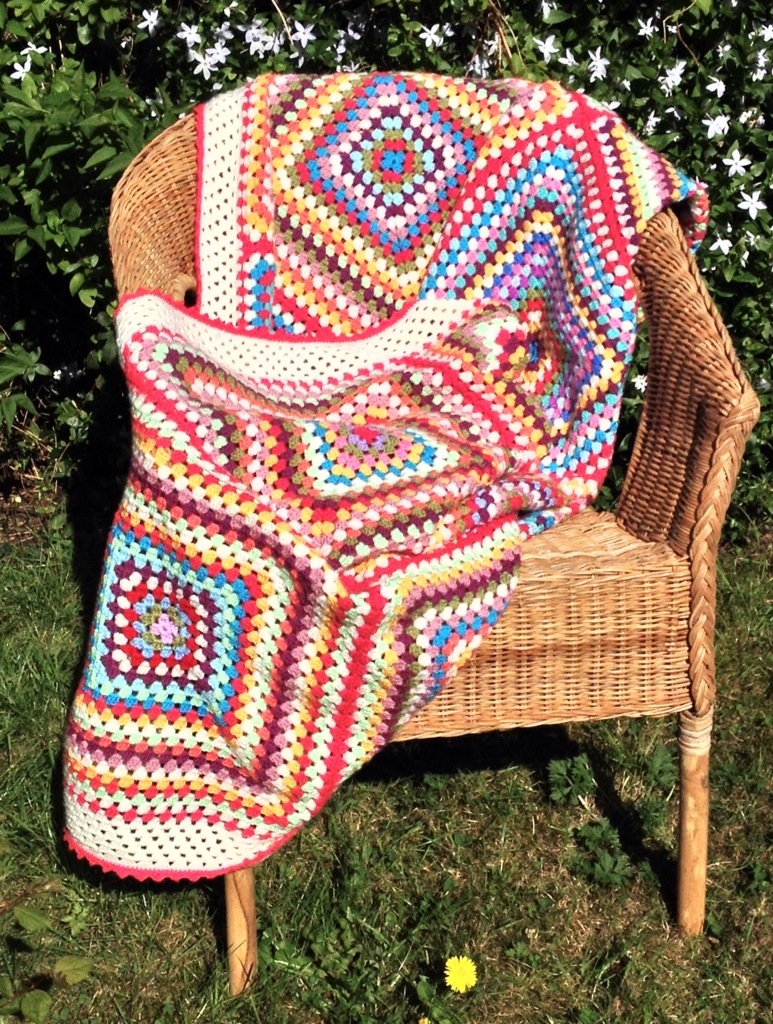
I chose a blanket pattern from their many free crochet patterns and my own colour palette.

Then I had a complete change of heart about the pattern, because dithering seems to be my new thing these days, but the yarn was already on the way. Oops. Oh well, I decided that actually my first big make should be something easy and relaxing. A summer crochet project which I could pick up and put down and which wouldn’t put my hand under too much pressure.

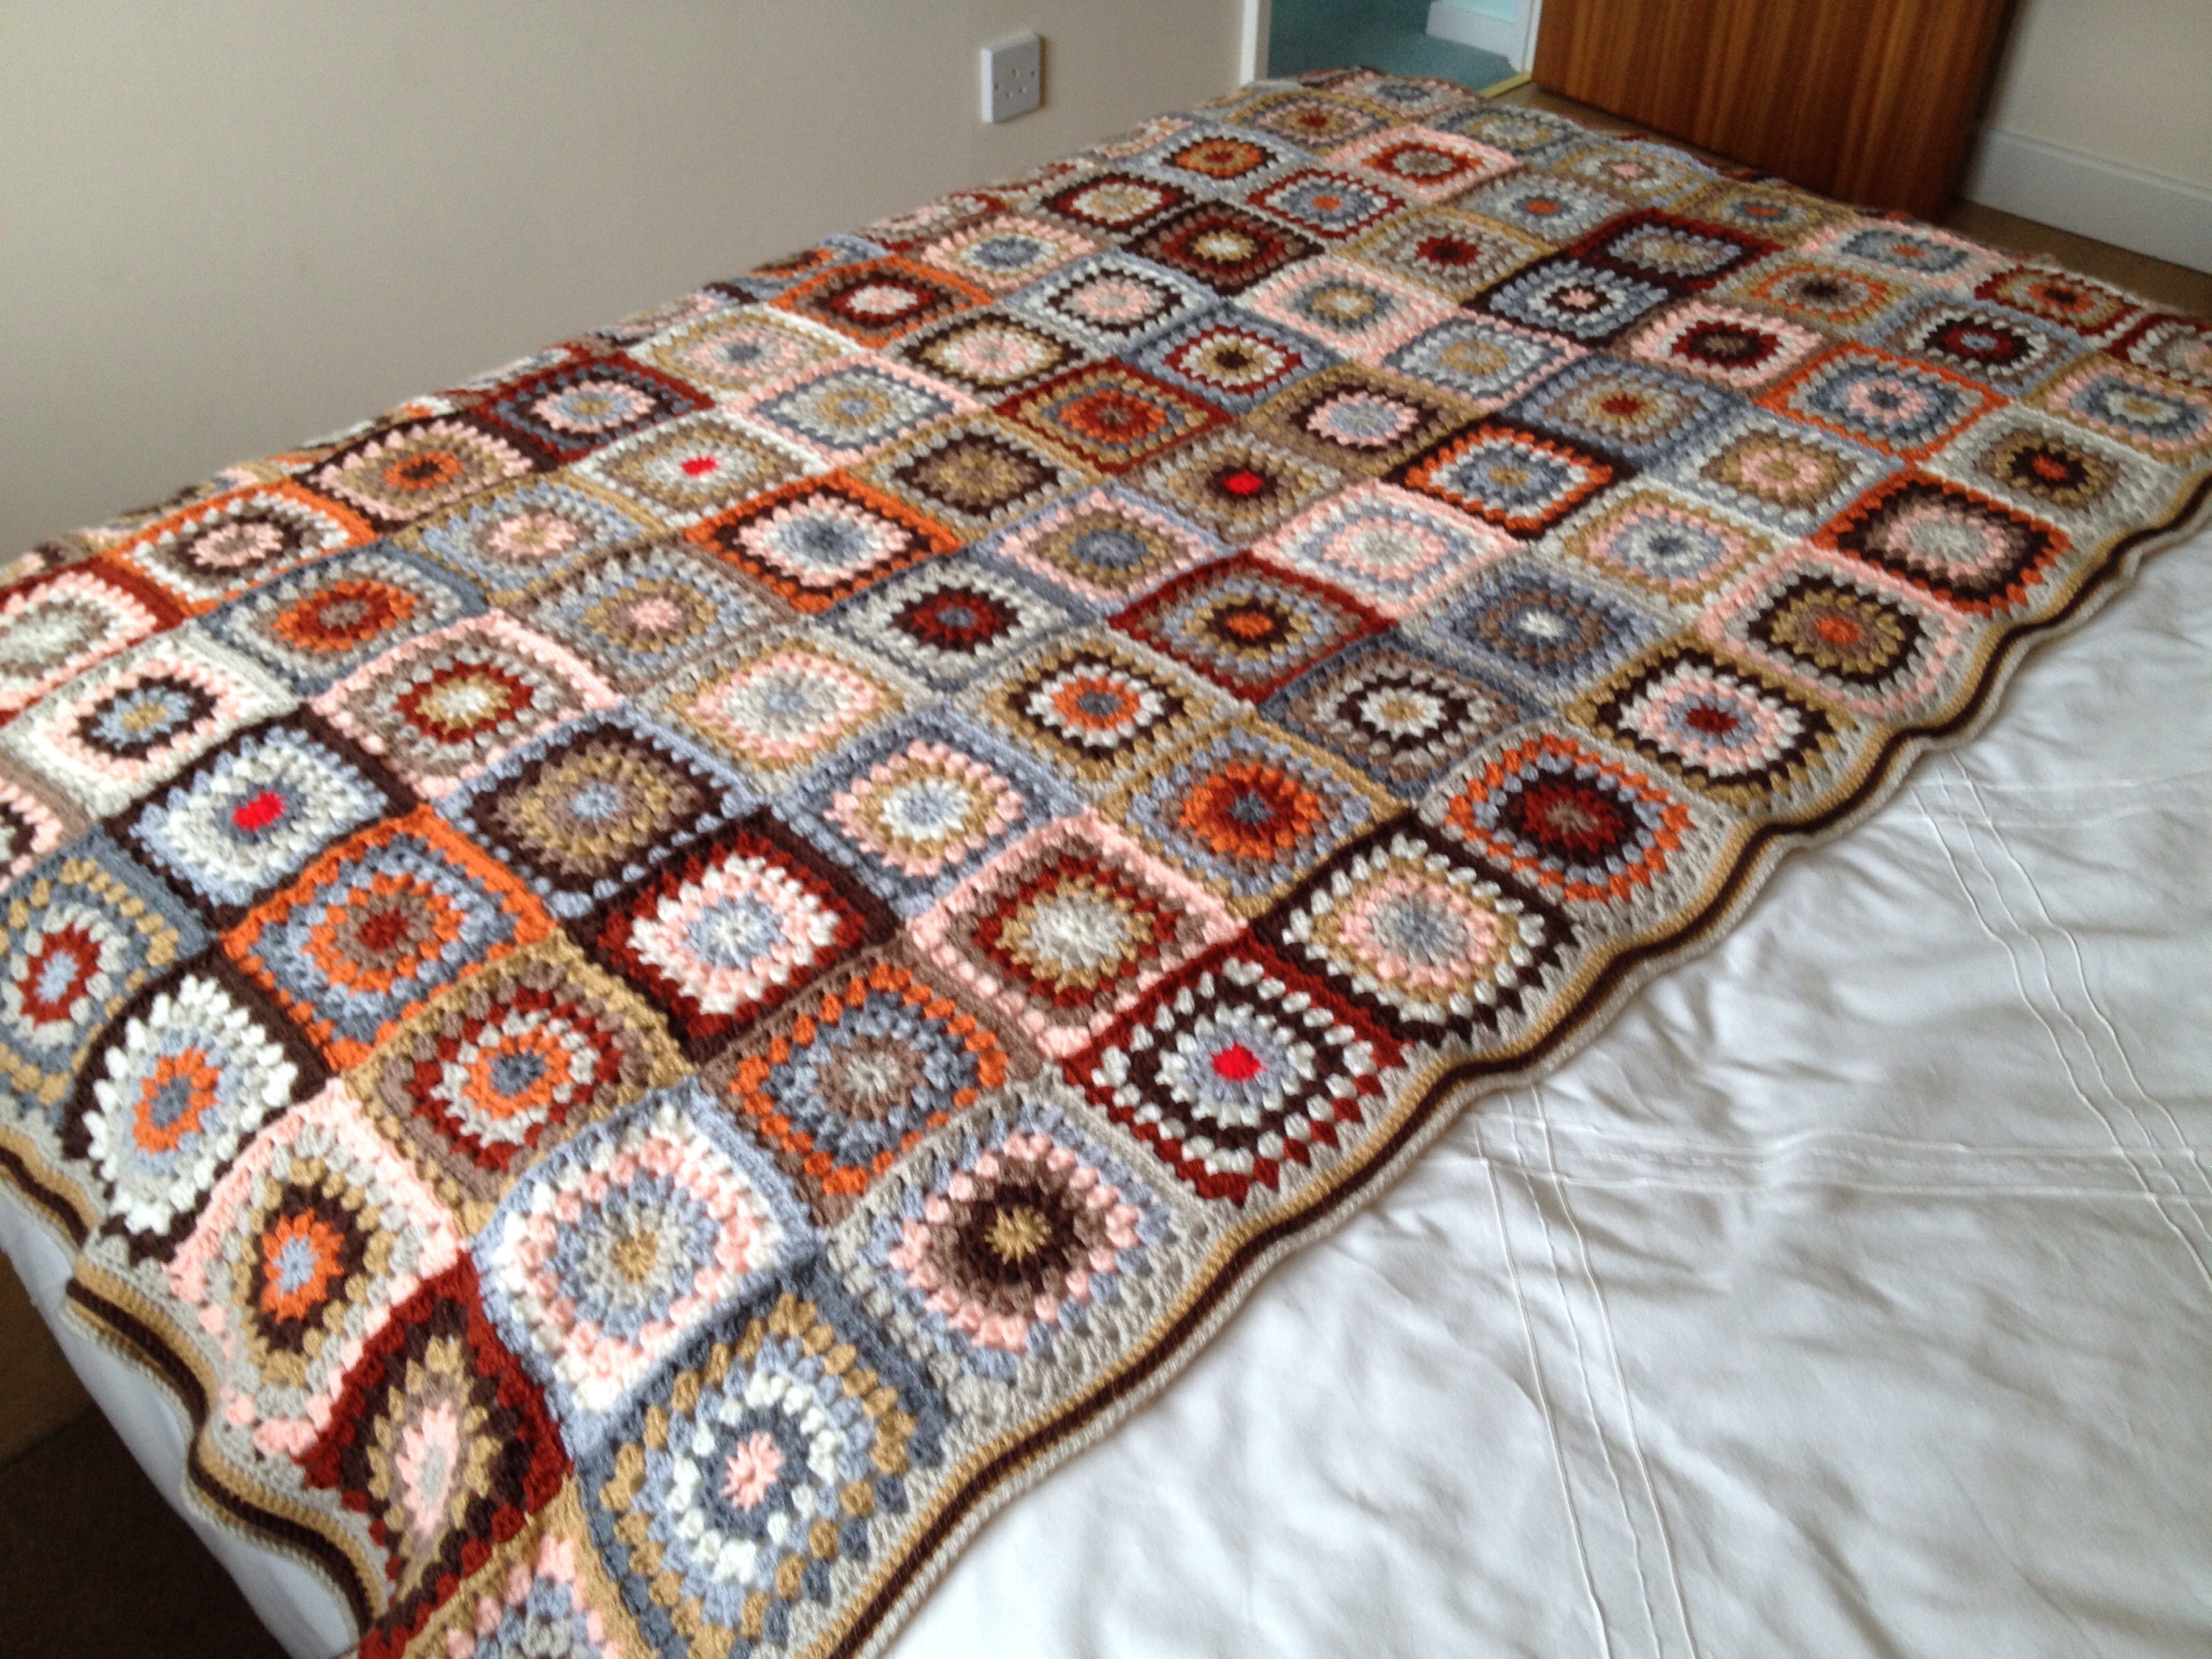
Plan B has worked out REALLY well because the Sleep Under the Stars blanket has got a similar overall quantity of yarn and it’s a really fun pattern. I’ve made three similar Star Ripple baby blankets before and I kept thinking how good it would be to have an adult sized star blanket to snuggle under… Wish now granted!

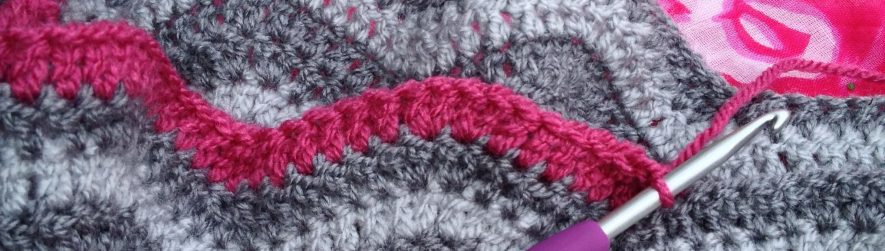
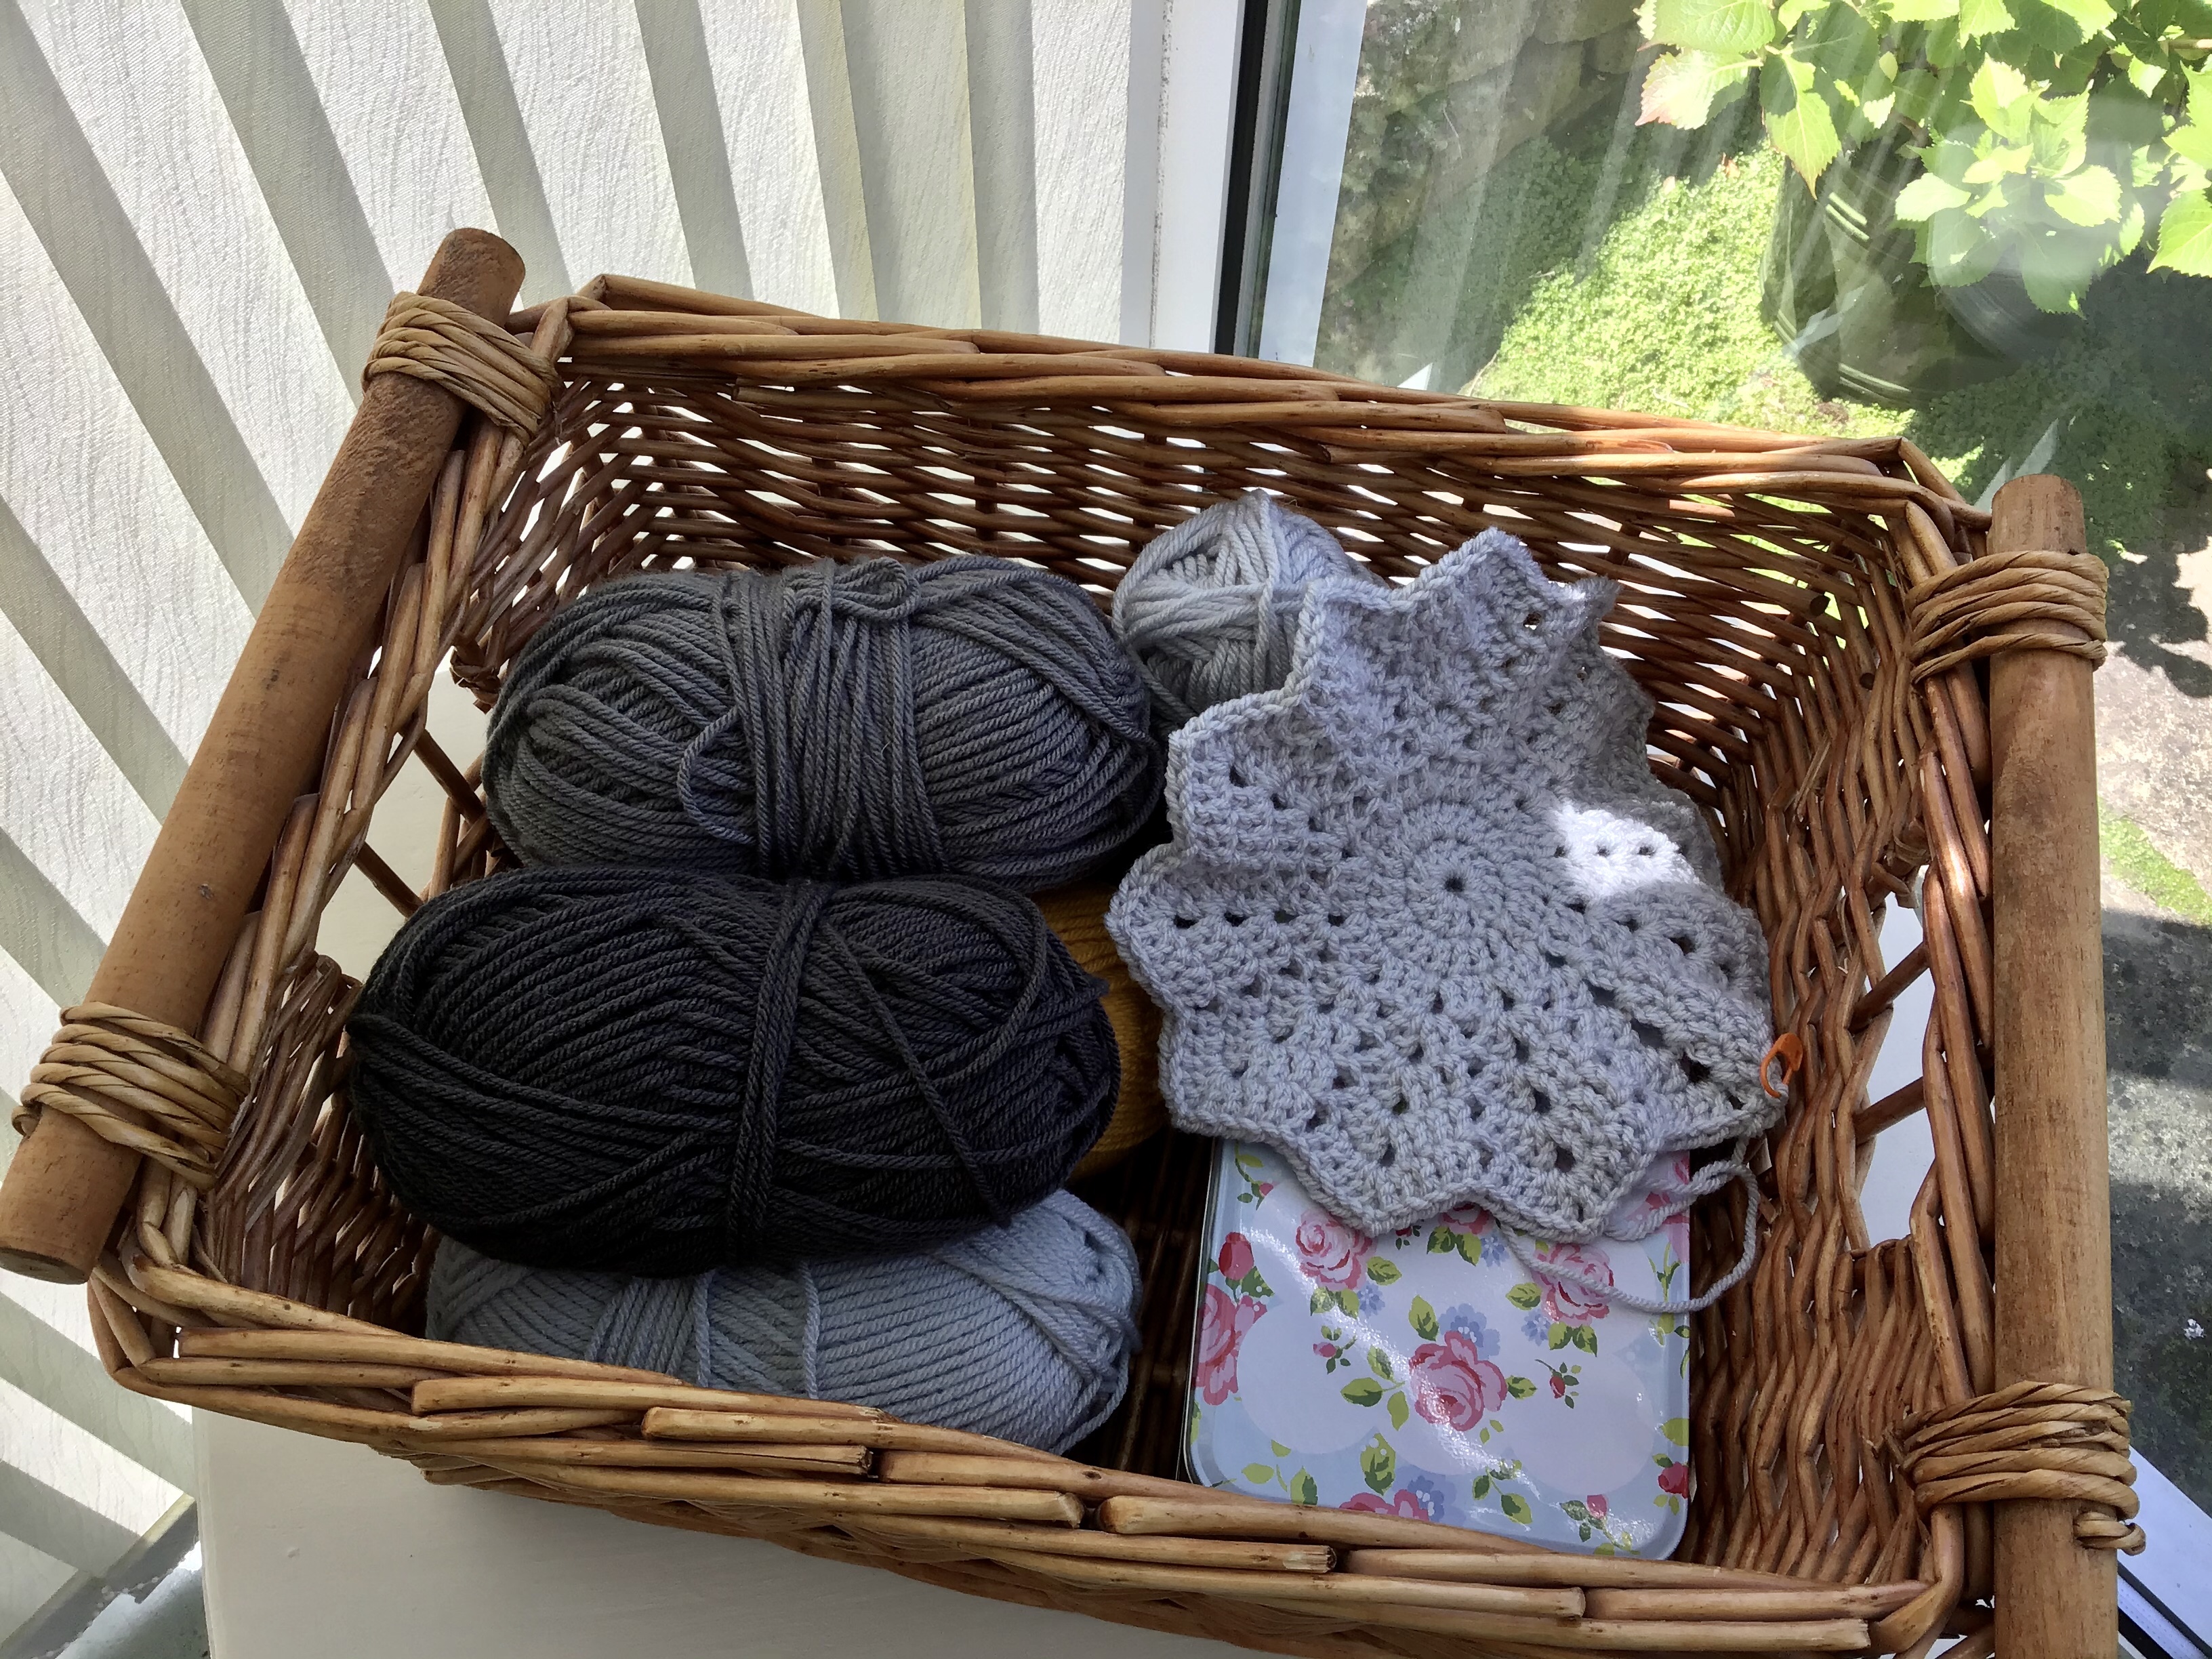
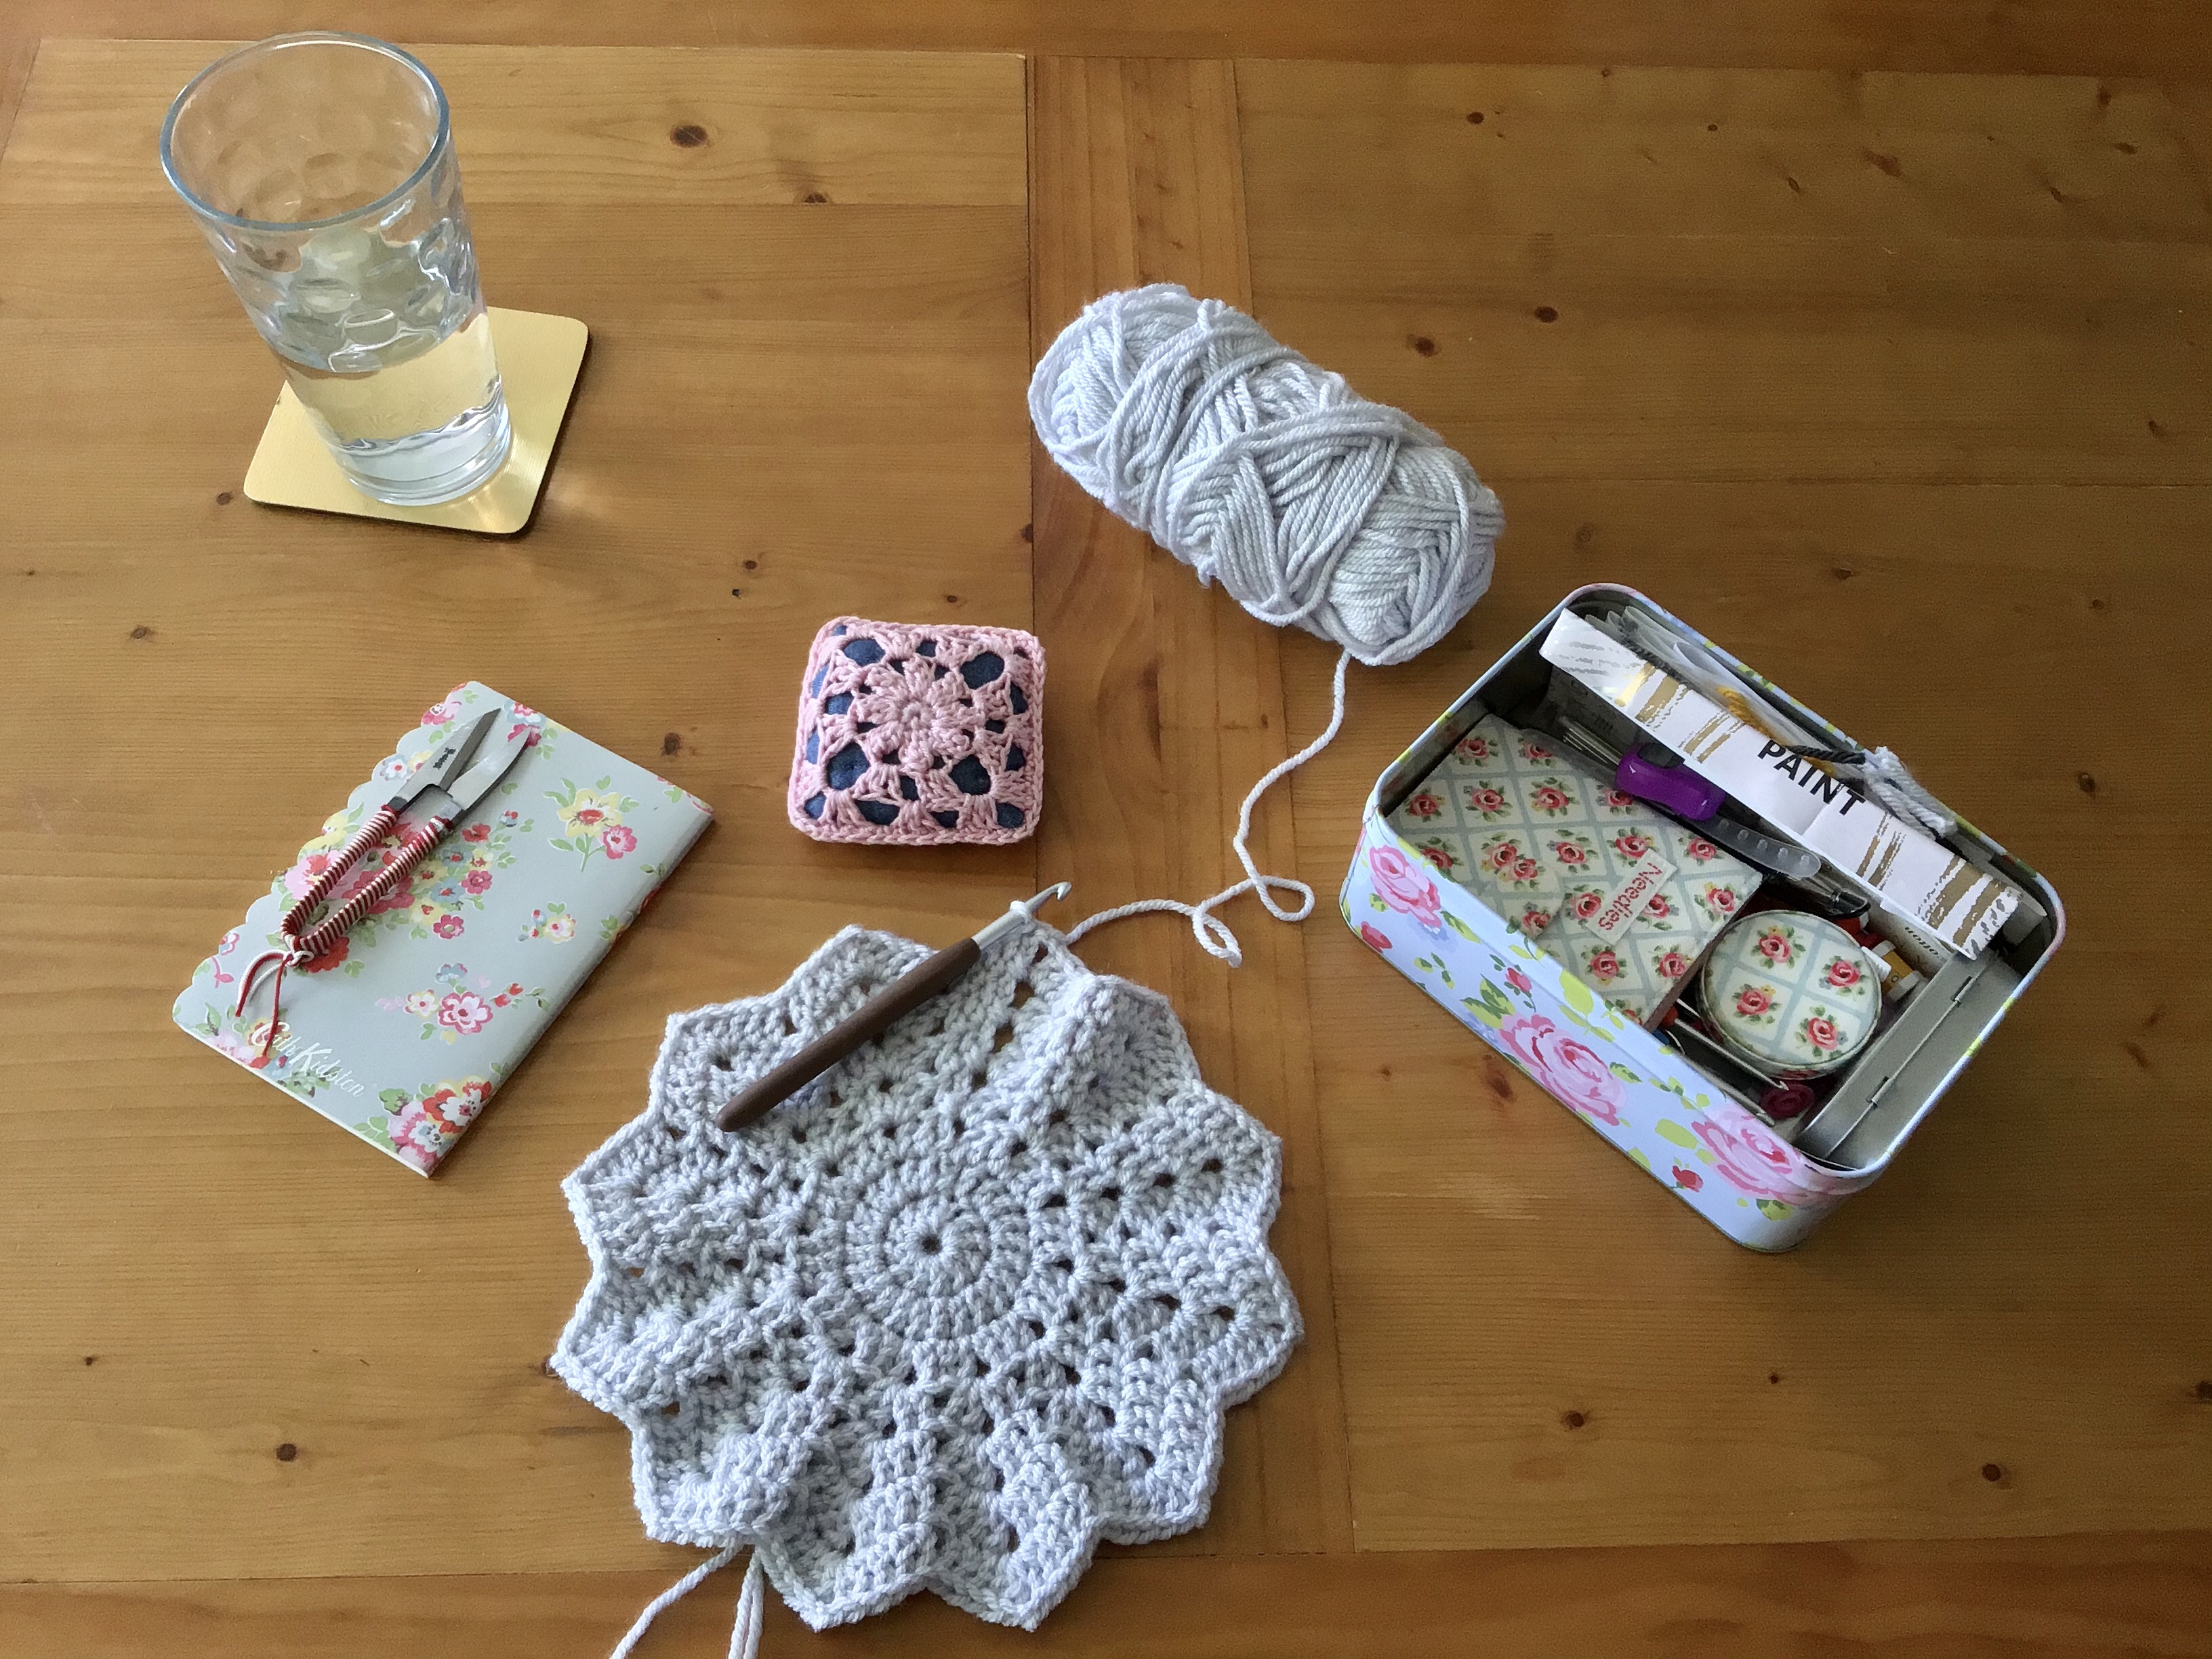
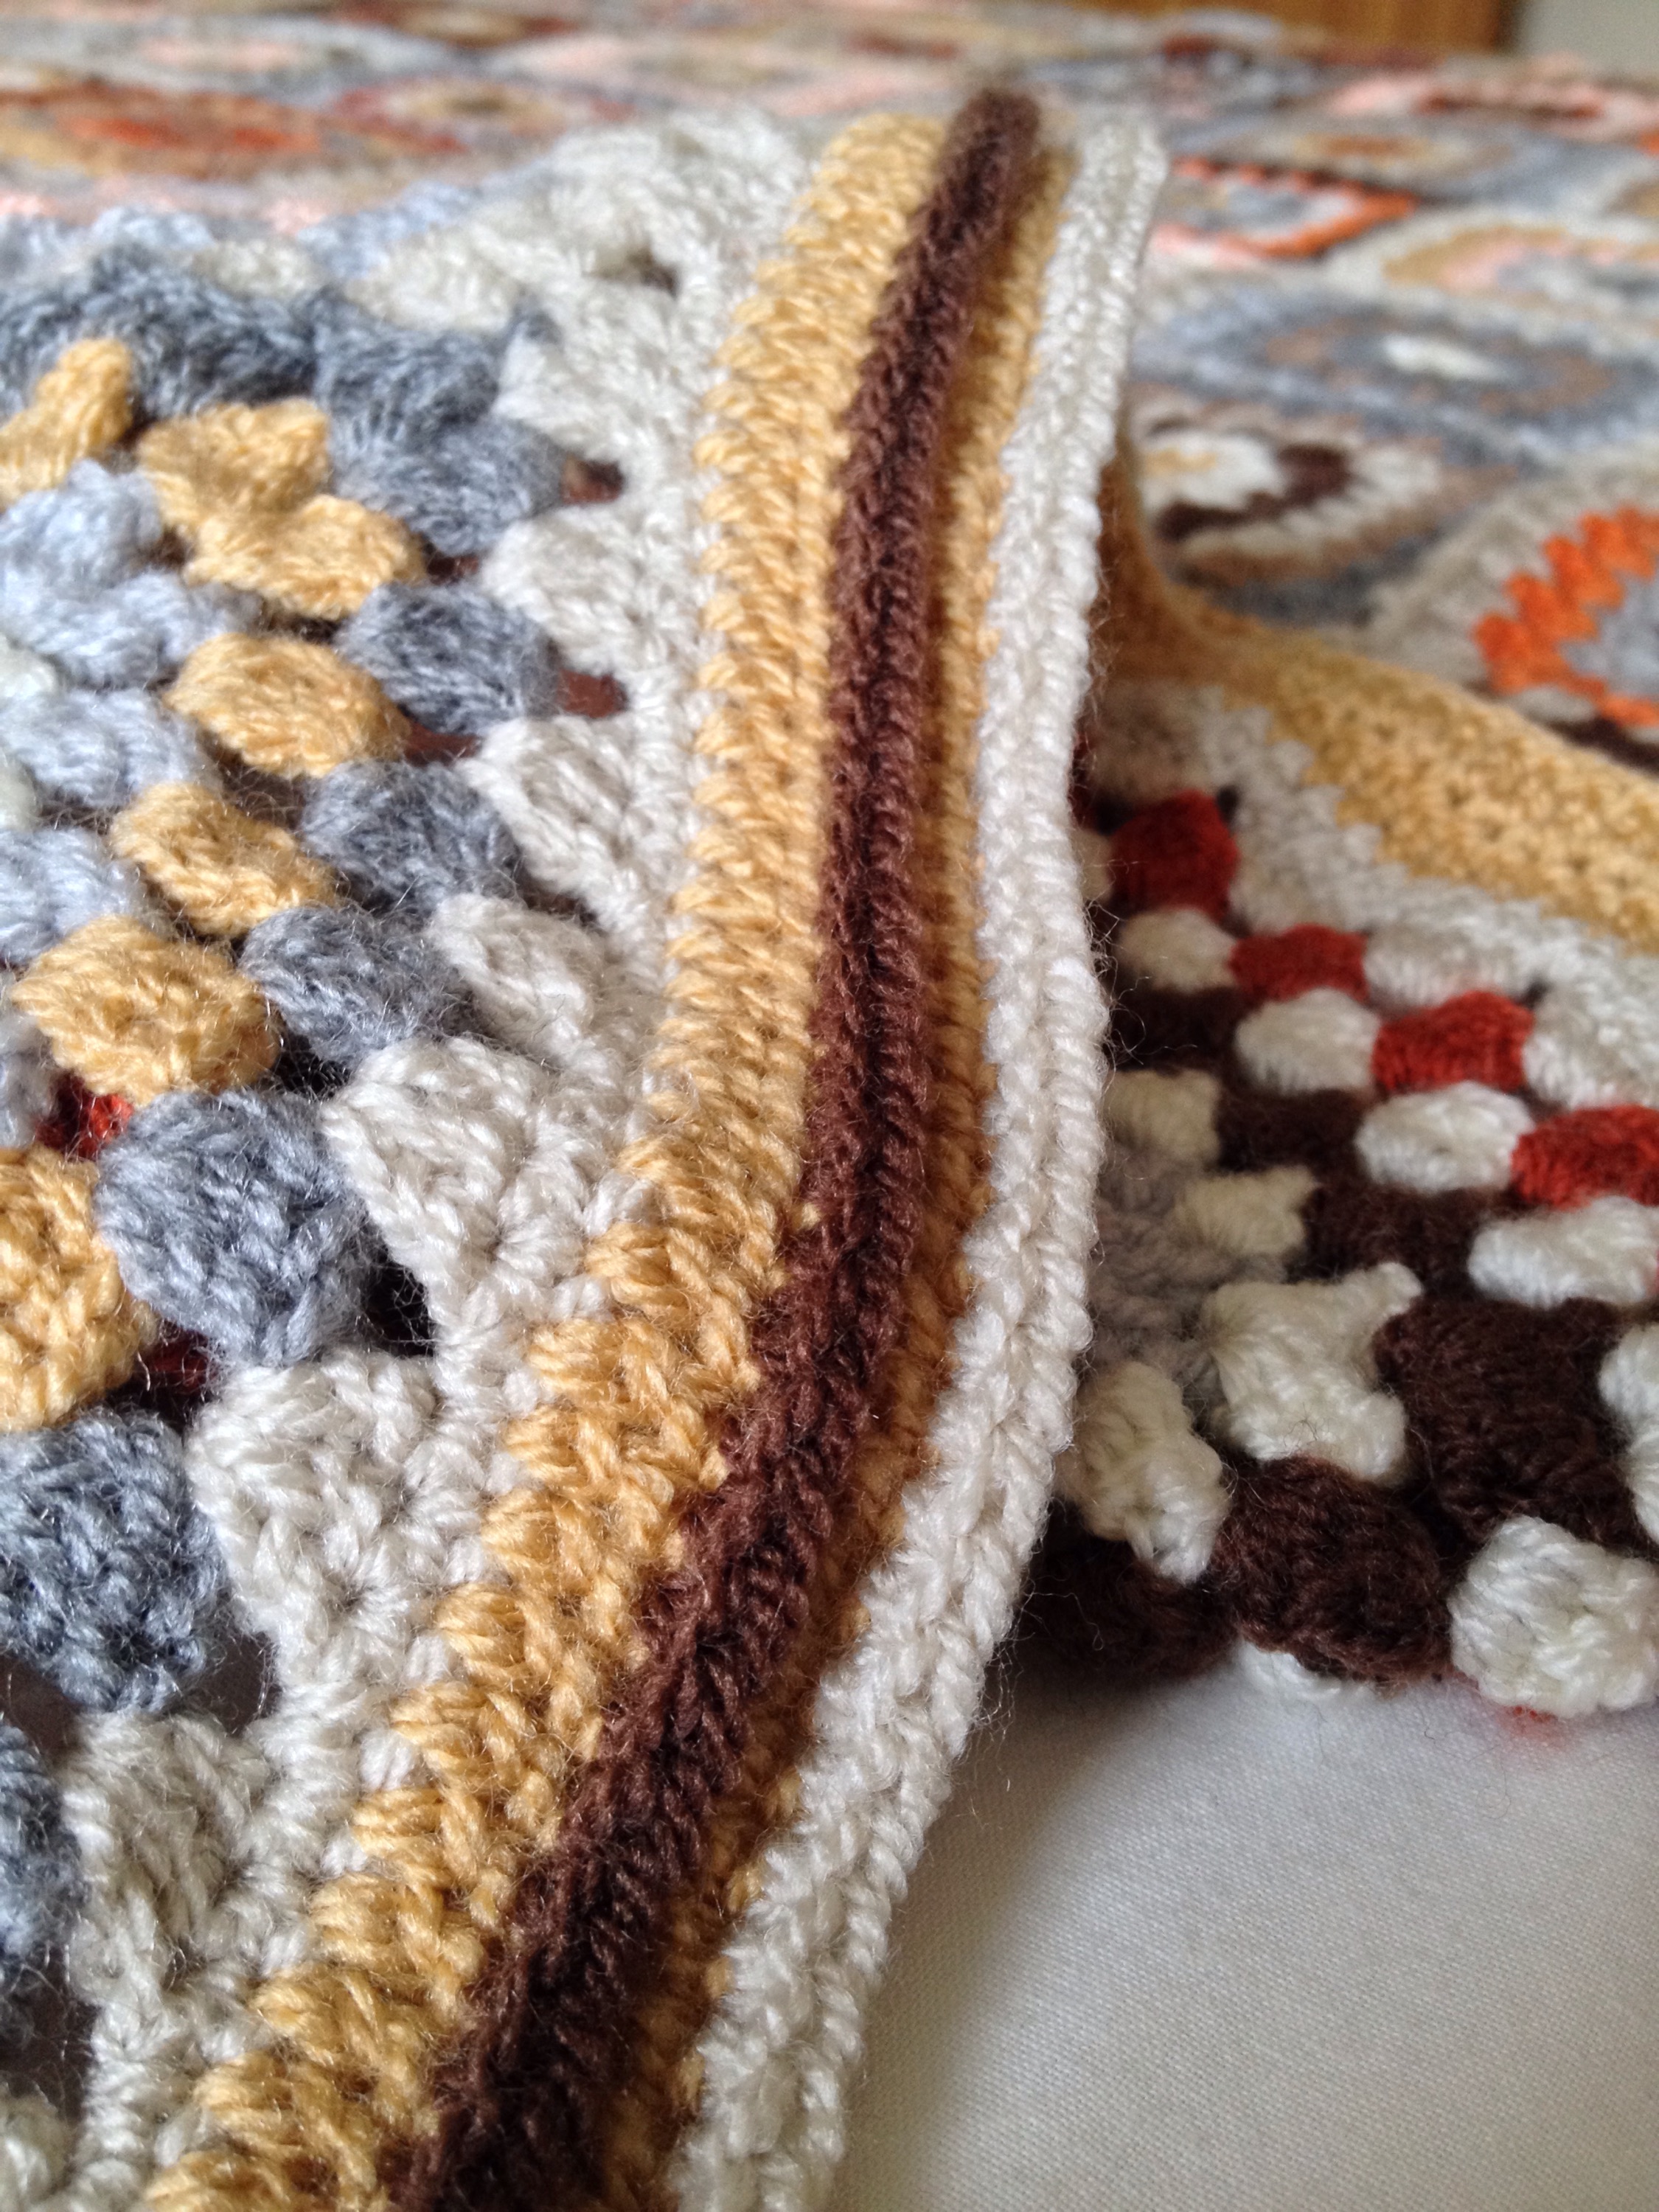
I chose Paintbox Simply Chunky in the following shades:

Granite grey / Mustard yellow / Slate grey / Misty grey / Pure black / Stormy grey

I was right about the yarn being squishy and incredibly soft. I’m loving it. Chunky yarn and a 6 mm hook means the pattern works up really quickly which is good as I’m limiting how much I do. I definitely made the right final pattern choice and I’m really happy!

What are you up to during these continuing lockdown days?

Very handy 

I’ve never managed to find out the name for this lovely textured stitch. If you recognise it please let me know. It’s one I used for a wash cloth ages ago and I thought it would make a good thickish pot holder.

Pot Holder

You’ll need to use 100% Cotton.I used DMC Natura DK with 4mm hook, I used roughly 30g, amounts will vary depending on your tension and size of your finished pot holder.

You could also use aran weight, or thicker, cotton with the appropriate hook.

My pot holder measures 6″ x 6 3/4″ / 15cm x 17 cm

All terms are for UK crochet stitches

FR: Chain 32

R1: 1 dc, 2 tr into the 2nd ch from the hook, miss 2 ch *work 1 dc, 2tr in next ch, miss 2 ch and rep from * across the row to the last 3 chs. Miss 2 chs, 1 dc in last ch. Turn

R2: Ch 1, 1 dc, 2 tr into 1st st, mis 2 st, *work 1 dc, 2 tr into next st, miss 2 st and rep from * across until the last 3 sts. Miss 2 sts, 1 dc into last st. Turn

Repeat R2 until piece is the desired length. (I did 24 rows.) Fasten off. Darn ends.

Repeat and make another piece exactly the same size, do not fasten off. Darn in the starting tail end. Put the two pieces together (wrong sides together.) Crochet them together working through all 4 loops as follows:

Edging:

R1: Work 2 dc into the same st as the last dc of your last row, also going through the 2 loops of the other piece too. Continue working along the edges of the cloths along the four sides, making 1-2 dcs into each stitch. Be consistent and do the same for both sides. I made 1 dc into each stitch on the top edge and at the sides, but 2 into the bottom stitches where the loop of the initial chains are wider.

Work 2 dc, 1 ch, 2 dc at the corners.

R2: Ch1, 1 dc into the 1st st, then make 1 dc into each stitch, chaining 18 (or the number you choose for the length of loop that suits) at the top left or right corner. Work 2 dc, 1 ch, 2 dc at the corners (increase the ch to 2 if you feel they look better or suit your tension, try it both ways and settle on one for all corners…) Secure the last ch with a ss into the 2nd dc corner stitch, make 1 dc into the same st, continue making 1 dc into each st around. Ss into the intial dc of the round.

R3: Ch1, 1 dc into the first st, then make 1 dc each stitch as before, 1 dc into each st of the ch loop and around. Ss to the 1st dc of the round. Fasten off and darn the ends neatly.

If you make a pot holder using this pattern please leave a link in the comments, I’d love to see yours.

(Saturday: I’ve just come across the stitch in The Harmony Guide to Crochet, it’s boringly called Sedge stitch II. Sedge stitch I is basically miss 2 ch, 1 dc, 1 htr, 1 tr and rep to the last 3 sts, 1dc in the last st.  That looks worth a try sometime.)

William Morris inspired motif blanket …..Finished!


If you hadn’t already guessed; the blanket is for my Mother and the William Morris design curtains are hers. She wanted a new blanket for the end of her bed to keep her feet warm and to snuggle up in during Winter. This will replace one that was made by my great grandmother for her many years ago, when I was just a twinkle in the sky. So, the pressure to get this blanket right and as lovely as I could make it, was high. I did wrap it in Christmas paper, singing falalalala, la la la LA! and it was received with pleasure.

 I was hoping to take some washing line pics, but post-blocking the weather was rather grim. These are not the best photos of a finished item at all; due to the poor light levels. And I realised afterwards that I’d plonked it on the bed rather quickly and didn’t smooth it out, oops sorry! Still, you do get the idea of its size and look…

I wonder if anyone will be inspired to use these Autumnal, rather retro colours? They weren’t my thing at all at first, but they really grew on me. It’s sometimes good to do something completely different. I’d given Mum my Stylecraft Special DK shade card and she chose the colours, while comparing them to the curtains. They look really good together, she chose well.

Yarn: Stylecraft Special DK

  1. Silver
  2. Grey
  3. Walnut
  4. Copper
  5. Spice
  6. Mocha
  7. Matador
  8. Parchment
  9. Cream
  10. Camel
  11. Apricot

Hook: 4mm for the motifs and JAYGO rounds

3.5mm for the border

Length: 5′ 7″ / 67″

Width: 3′ 5″ / 41″

Weight: 1,422kg

Motif: my own design as follows…

UK terms

FR: Ch6, ss to join into circle

R1: Ch4 (Counts as1 tr and ch 1) *Tr into circle, ch 1 repeat from * 10 more times, join with ss to 3rd ch of ch , ss into next ch sp (12 tr)

R2: Ch3, tr2tog in same space, ch3 *tr3tog in next ch sp, ch3, repeat from * 10 more times, join with ss to top of ch3, ss in next ch3 sp

R3: Ch3, tr2tog,ch2, *tr3tog repeat twice from * to corner then tr3tog, ch3, tr3tog and so on around motif, ss to ch3

R4: As for R3 repeat from * three times to corner then tr3tog, ch3, tr3tog and so on around motif, ss to ch3

R5: Now a more traditional granny square round without clusters: Ch3, tr2, ch2, *tr 3, ch2, tr 3 repeat from * to corner then tr3, ch2, tr3 (I found that ch2 in the corners of this round worked best, but you might find continuing with ch3 works best in yours.)

R6: JAYGO using a ch1, ss, ch 1 in the corners, along the sides ss, ch 1 then tr3  and so on (see this tutorial by Lucy of Attic 24 for help if you need it.)

Please let me if these instructions make no sense, or if you notice an error, it happens!

IMG_6310
Border: When doing the first row of the pre-border edging you’ll find where you’ve JAYGOed two motifs together you have a lot of stitches along the edge each time when you come to where the corners of the motifs are joined (see photo above.) This is the solution that was passed on to me by Rachel, aka Mrs Pip: treble one stitch on the left hand side of the join, then treble two together – with a treble placed on each side of the JAYGO join – then make a final treble. This leaves only 3 stitches for the next round, but is wide enough to straddle the seam without being too tight. I enjoyed this round, it felt both interestingly different to crochet and pretty ingenious!

I did the final pre-border round in parchment, with a dc into each tr of the previous round and 3 in the centre stitch of each corner.

 Showing the back of the border

Border: #107 from Around the Corner Crochet Borders by Edie Eckman. It’s lovely and I really like the 3D effect that rounds 2 and 4 give from making dcs into the front loop only. It’s a thick border which goes particularly well with this heavy blanket.

I steam blocked the entire finished blanket, lying it on my foam mats on top of beach towels, blocking two thirds then the last third. Wear SHOES if you do the same, do not block scald your feet!

And now I’m crocheting a very small thing…

Baby hexagon a day blanket

I’m ahead of my hexie a day plan but they’re so cute and easy to make!

I’ve changed the pattern I’m using because I think the shape is better and it looks much more like a hexagon! I found this pattern posted by @cuteashook on IG. It’s in graphic form so if you prefer charts go there, or to my page. I’m not sure who to attribute it to, if you know please let me know.

/home/wpcom/public_html/wp-content/blogs.dir/1e4/30995756/files/2015/01/img_8526.jpg

Do you want to join in with crocheting a baby hexagon a day too?

Baby hexagon pattern

UK terms

All trebles in R1 are worked into the FR, then on R2 into the chain space of R1.

FR: ch 4, join with a SS to make a ring

R1: ch 3 (counts as a treble) tr 1, ch 1, *tr 2, ch 1* repeat 4 more times, SS to 3rd ch of beg ch3 (6 groups of 2 trebles) ss to 3rd st of beg ch.

R2: ss a couple of times to next ch sp from last round, ch 3 (counts as a treble) tr1, ch1, tr2 *tr2, ch1, tr2* repeat 4 more times. (6 tr ch groups.)

You’ll know you’re at the end because you’ll have a baby hexagon. If not a) start again b) let me know that there’s a mistake here!

Darn in the ends.

I’m joining as I go on the second round, replacing the chain in the middle of the trebles with a joining slip stitch. I have two joins per side. You might want to join three times along each side, its up to you. I tried it both ways.

I’m going to use whatever DK yarn I’m using for other projects through the year and so it will turn into a kind of memory blanket. You can use finer or chunkier yarn as long as you stick to the same weight all year. I guess if you were feeling very keen you could make 3 hexagons a day in 3 different weight yarns, a blanket to keep and a few to give away for Christmas?

My eggs need to go into the pan now – I hear the water boiling. I have a yen for an egg and watercress sandwich for lunch.

Are you joining the baby hexie a day gang?

Homemade compliments

I’ve just read Sarah of Crafts from the Cwtch blog post about how her new knitted Colourblock Shawl has prompted compliments from strangers on the street. This reminded that when I wore my crocheted ribbed scarf to evening class on Tuesday I was complimented on the colours. It’s so gratifying to make something handmade and have it noticed. (For the right reasons!) Shop bought rarely gathers compliments; I guess the colours and designs can be too generic to stand out.
IMG_0381.JPG
If you want to crochet a ribbed scarf the pattern’s here. Or, you could dig out your knitting sticks and make Sarah’s cosy shawl.
IMG_0382.JPG

Currently I’m rippling away still, full speed ahead. The end is in sight, bar the darning and border. I have about 19 more stripes to crochet and I’m whizzing along to (don’t judge me) Glee: season 4. I gave up on Glee at the beginning of series 3 which was shown years ago here. It was so samey and they looked far, far too old to still be hanging around a High School music room! Series 4 was apparently broadcast two years ago, most of the originals have moved onwards and upwards which makes it fun seeing their next steps. It keeps me singing along as I fiercely hook, hook, hook on the sofa. To be honest I am absolutely dying to make some small fun makes, but I know I have to get the zesty raspberry ripple finished and then go back to the motif blanket. Both WILL be completed in time for Christmas.

What are you up to?

Brian – V Stitch Scarf / Cowl

IMG_7813.JPG

A couple of people have asked me what I’m crocheting at the moment. I should be concentrating on my motif blanket, and ripple, but I’m really enjoying simple crochet. I woke yesterday feeling really unwell and today don’t feel much better, and this is perfect. I watched my first Disney film, Tangled, in years yesterday afternoon. Maybe the first since the Little Mermaid? I can’t tell you how much I enjoyed it, that’s a definite sign of my custard brain. The animation seems more like 3D than before, perhaps Disney have had to adapt their technology to keep up with Pixar type films? The characters, especially Rapunzel, looked just like Blythe dolls, all huge eyes and small faces.

IMG_7810.JPG

I had some good news – Lang have NOT stopped making Tosca Light it’s just that for some reason I couldn’t find it on their website. I’m so pleased. If you look under Autumn / Winter on their website you’ll see the range of colours. (I know…they should make me a Tosca Light ambassador.) Lang is a Swiss company in case you’re wondering, TL is made in Italy.

IMG_7811.JPG

I’ve been looking out for other types of v stitches in my Harmony Guide to Crochet Stitches. I was lucky enough to find it in a charity shop for a song a few years ago. They call this one Three-and-Two Stitch, it’s descriptive but a bit dull…

I’ve run out of yarn as I had only one 100g ball left and my scarves tend to need 150-200g as I like them lonnnng. Time to find some more. If I won the lottery I’d just fill a room with it. Oh, why not a house actually?

I was really pleased to hear that Kate’s (Greedy for Colour) Mum; Mrs A in Australia (Rambling with me) is crocheting a V Stitch Scarf, using my last pattern which you can find HERE. The power of the internet eh – sharing what we’re making with others all over the world. I really love it. I should put pattern links on Ravelry. One day.

IMG_7812.JPG

I asked what I could call this scarf and had “Brian” as the answer. Well, why not? I did ask!

Brian v stitch scarf / cowl

5mm hook – if you’d like a lazy, looser type of fabric, but try a swatch and see what you feel. I tried with a 4mm hook and it was nice too, although quite a firm fabric with far less drape.

150-200g DK yarn depending on the length of scarf or cowl you prefer
Lang Tosca Light is 100g/400m a ball 55% new wool, 45% acrylic.

Width: 22cm / 8 5/8ths ”
I’m aiming for – Length: 80″ / 203cm
Will probably be – Weight: 150g -200g

V stitch = 1 tr, 1ch, 1tr (UK)V stitch: 1 treble, 1 chain, 1 treble into same space (UK terms)
ch = chain
tr = treble
v st = v stitch
ss = slip stitch
st = stitch
tch = turning chain
sp = space

Foundation Row: Ch 50
Or a multiple of 6 st + 2 to get the width you want
R1: (Right side) Work a v st into 5th ch from hook. *Miss 2ch, 3tr into next ch, miss 2ch, work a v st into next ch; rep from * to last 5ch, miss 2ch, 3tr into next ch, miss 1ch, 1tr into last ch, turn
R2: 3 ch, *miss 2sts, work 3tr into centre tr of next 3tr, work a v st into ch sp at centre of next v st; rep from * ending 1tr into top of tch, turn
R3: 3ch, *v st into sp of next v st, 3tr into centre tr of next 3tr; rep from * ending 1tr into top of tch, turn

Rep R2 and R3 until desired length. I’m aiming for about 80″/203cm.

If making a cowl join short ends together using ss; bearing in mind before you join the ends that there is a right and wrong side to the fabric. Finish off and darn ends.

~~~~~~~~~~~

I’ve been meaning to say this for a few years(!) when I get to the turning chain of the previous row I always find it easier to use a 3mm hook to go into and make the last stitch, aiming for the same tension as the rest which I’ve made with a 4-5mm hook. That might be a useful tip if you’re new to crochet and have trouble seeing or feel like you’re forcing the hook through the top of the chain, it depends on your tension and eyesight probably!

Also, when crocheting in rows after I turn I’ve always taken the hook out of the stitch, rather than twisted the stitch. Do you? I’ve always wondered if that’s correct, me being pernickety or just silly?

Happy v stitching your Brian scarf / cowl!

V Stitch Scarf / Cowl

IMG_7715.JPG

I finished this last night, while watching Birdsong. It was such a fast make and if you’re thinking of crocheting a C———- gift for someone this would be perfect, particularly if you’re a last minute crafter.
IMG_7716.JPG

IMG_7717.JPG

I prefer scarves because you can wear them lots of different ways, with a cowl it seems there’s really only tight or loose. You can easily crochet, or sew, the two short ends together before fastening off if you prefer a cowl.

IMG_7718.JPG

IMG_7722.JPG

V Stitch Scarf / Cowl

Yarn: Lang Tosca Light DK
55% new wool
45% acrylic
1.5 x 100g ball, 400 m

Hook: 5mm (You want to crochet a fairly loose and lacy fabric)

Length: 80″ / 203cm
Width: 9″ / 23cm
Weight: 150g

V stitch: 1 treble, 1 chain, 1 treble into same space (UK terms)
ch = chain
tr = treble
v st = v stitch
ss = slip stitch
st = stitch

Foundation row: Chain 48
Scarf / cowl can be made narrower or wider by adjusting starting chain by 3 stitch multiples
R1: Tr into 4th ch, tr into each ch to the end, turn
R2: Ch 3, (counts as a tr at beginning of every every row) tr into each tr to end of row, turn
R3: Ch 3, v st into 3rd tr (skip 2 tr, v st into next tr) to last tr, 1 tr into 3 ch of the previous row
R4: Ch 3, (v st into each space of v st of previous row) across row, 1 tr into 3 ch of the previous row
R5: Ch 3, (1 tr into first st of v st, 1 tr into space of v stitch, 1 tr into 2nd tr of v st) across row, 1 tr into 3 ch of previous row
R6: Ch3, (1 tr into 2nd tr and every tr) across row, 1 tr into 3 ch of previous row

Repeat R3-6 until scarf / cowl is desired length. (If making a cowl join short ends together using ss; bearing in mind before you join the ends that there is a right and wrong side to the fabric.) Finish off and darn ends.

Try on and flounce about in front of mirror/your significant other.

IMG_7719.JPG

If you make one of these I’d love to see yours, please leave a link below or tag me on IG.

Huge granny square blanket – finished!

20140418-155949.jpg

20140418-160004.jpg

20140418-155957.jpg

20140418-160114.jpg

20140418-160235.jpg
Otherwise known as the Tilting Granny Squares blanket! Sounds ridiculous, I know, but I didn’t actually notice the tilty nature of the squares until I’d crocheted about six. This was probably due to the cider and chat as I crocheted lots of them in pubs with other crochet and knitty folk. I was momentarily tempted to undo, or worse – throw them away – but then decided just to go with it. The end result is strangely pleasing. We really like the tilting!

I Googled tilting granny squares and it seems it’s very common when you crochet many rounds, or make one of those blankets where they’re basically one huge granny square. Have a look online at granny square blanket pics and you’ll begin to notice it a lot. I did wonder about making a Pinterest ‘Tilting squares’ board as I went, but thought some people might not be very pleased to see their work! Now I wonder if you see a photo of a blanket heaped on a chair, never spread out, then it might be hiding it’s tilty nature! I’ve spotted tilting target square cushions too.

Tilting is thought to perhaps be down to tension. I reckon it’s more likely to just be the gentle drag of the hook as you repeatedly go in the same direction.  One way to avoid tilting is apparently to change direction on every round. I asked a crochet and knitting designer and she said hers tilt too and it’s ‘just one of those things.’ On a forum I read someone had suggested you embrace it and make a feature out of tilting squares, and that’s what I decided to do. At first I considered laying them out so they tilted in the same direction per row, order in disorder, but ignored the thought and concentrated on colour placement of the squares. I joined the squares listening to the final chapters of this bookaudio book cover. I was addicted to the story, completely engrossed.

I wanted to use up all my odd balls of Stylecraft Special DK and I really didn’t ever intend to keep the blanket. I ordered the multi-coloured SS DK packs when I was new to crochet, now I want to choose my own combinations. I’d planned to give this stash busting blanket away, or maybe try to sell it. But with the tilting factor it’s so quirky and fun that it’s here to stay. Last night I felt chilly curled up on the sofa, so it’s been christened already.

Details:

Blanket weighs: 1.362 kg

Measurements: 70″ long, 52″ wide (single bed size, or to wrap self in on the sofa!)

Yarn: Stylecraft Special DK

Hook size: 4mm

Granny square:

There are many similar patterns but here’s the version I like to use:

FR: Ch 5, join with a ss

R1: Ch 3 (= 1 tr) 2 tr, 3 ch, 3tr, 3 ch, 3 tr, 3 ch, 3 tr, 3 ch around, join with a ss into 3rd st of ch 3.

R2: Ch 4 (=1 tr, 1 ch) then in next chain space work  3 tr, 1 ch, work (3 tr, 3 ch, 3 tr) in corner, repeat around and then 3 tr, 3ch, 2 tr and join with a ss into 3rd st of initial ch 3.

R3: Ch 3 (=1 tr) then into same space work 2 tr, 1 ch, repeat along edge chain spaces, (3 tr, 3 ch, 3 tr) into corner spaces. Join with a ss into 3rd st of initial ch 3.

Repeat R3 until you have 20 rounds in total.

Make a dozen 20 round squares, then join as you go using one colour to frame the squares. I think it looks ‘bare’ without a border.

My border: 6 rows of cream trebles (3 tr, 1 ch around with 3 tr, 3 ch, 3 tr at the corners.)

R7: 1 row of DC in cream (3 dc into the corner chain spaces)

R8: 1 row of DC in pomegranate (3 dc into the corner chain spaces)

R9: Dinky pointy edge: * 1 ss into each of next 3 dc, then in next dc (1 dc, 2 ch, 1 dc) * Repeat from * to * around.

Snuggle.

Knitted cactus pin cushion

Inspired by a cactus pin cushion I spied in a craft shop in the Summer I decided to have a try at making my own version after my table got a bit scratched by my new pins the other week. They’re too long for my 20131111-102229.jpgpin cushion which I reckon would be termed ‘vintage’ now as the material dates from the 1970s. I’m wondering if these are really millinery pins?

20131230-154113.jpg
I glued a circle of felt to the bottom of the flowerpot so it wouldn’t scratch the table. I bought a new terracotta pot although you’d never know with all the glue marks I’ve left. At least I didn’t superglue my fingers together, though I did ruin the trousers I was wearing due to glue blobbage as it set firm in a plastic disc. Oops.

20131230-154127.jpg
There’s a lump of polystyrene at the bottom of the flowerpot, then some toy stuffing so the cactus sits at the right height. Next time I might try using rice or similar just because of the huge mess the polystyrene made (see photo on my Facebook page…) when I tried to saw a chunk from a piece I’ve been hoarding.

20131230-154141.jpg

How to knit a cactus

I used Stylecraft Special DK Meadow Green, with 4 mm needles.

Cast on 30 stitches for the main body of the cactus
Rows 1 & 2: Knit 2 rows of stocking stitch (that’s 1 row in knit stitch, the next row in purl stitch)
Row 3: Knit a row of garter stitch (that’s all knit stitch)
Repeat these 3 rows until you have a nice tube – check this by keeping the knitting on your needle and folding the rectangle in half until it’s the diameter you’re happy with.
Don’t cast off, just cut the thread leaving a length to thread a needle and gather up all 30 stitches tightly, fasten off securely and darn in the ends. That’s the top of your cactus.

Cast on 15 stitches for the ‘arm’ of the cactus (I probably need to look up cactus terminology?!)
Repeat the 3 row pattern, as for the body, until you’re happy with the tube you’ve made. As above, gather up the stitches and secure.

Crochet some earth!

FR: Chain 6, slip stitch into a circle.
R1: Treble 6-8 into the circle (depending on your tension)
R2: Chain 2, then DC into each treble of the previous round
R3: Chain 2, then DC into each DC of the previous round, increasing into every other stitch
R4: Chain 2, then DC into each DC of the previous round, increasing into every third stitch

Continue rows in the same way increasing into every fourth, then fifth, sixth stitch etc until the circle fits nicely into your pot.

Sew the arm onto the body of the cactus and then sew the cactus onto the earth circle (sounds New Age?!) Use superglue with care, sticking the sides of the earth circle to the pot.

Stab the cactus with an assortment of pins and darning needles until it’s suitably spiky.

20131230-154155.jpg

20131230-154213.jpg

Here it is in use last night as I began preparing to sew a Cath Kidson pattern – a large tote bag.
20131230-154218.jpg

It’s an anniversary today – 2 years of The Little Room of Rachell. How time flies! When I look back I’m amazed at how much I’ve made, with lots of learning curves. I really didn’t think I’d still be blogging beyond learning to crochet, which was my goal for the New Year of 2012, but it’s been fun making crafty connections with others and sharing what I’m up to online diary style. So I carried on day by day, week by week without a plan. I just looked at my stats and this is my 305th post! Admittedly I’m rarely short of something to say, both here and in real life! Thank you for reading, especially if you’re part of the little band of followers who’ve been here since the beginning. And thank you for leaving so many great comments (2,374!) I always really appreciate it when you stop to type your thoughts, or respond positively to a post. As many of you know I often reply with an email, it’s been fab batting chatty messages back and forth.

The blog’s definitely evolved and is not solely crochet focused anymore. This year I’ve been dabbling in all sorts of crafts, although crochet is still a big part of how I spend my spare time. I joined a knitting group in the Autumn and find it far easier to crochet while I chat and get to know the group. I don’t have to look at what I’m doing all the time, and I always take something simple like the huge Granny Squares so there’s no counting or complicated pattern to follow. Several of the group are also both crocheters and knitters which is cool.  I have to say that it’s nice to watch someone else also wave a hook and a glass of wine around!

Have a fun New Year’s Eve! Enjoy reflecting on the past year and looking ahead with crafty resolutions, learning goals or just anticipating lots of creative fun to come in 2014. :-D xxxx

I need your help, please

For ages there’s been one item I want to crochet from this book:

20131211-164715.jpg
But I’m stumped, really stumped right at the beginning of the pattern for the Cabled Yoke Cardigan…

20131211-164824.jpg
I’m wondering if the hitch is because I’m crocheting as a leftie, though there shouldn’t be a problem other than the cable slanting t’other way. Maybe there’s a pattern problem (extremely unlikely) or maybe I’m just being daft and getting something wrong. The little strip looks good enough until row 4, which is actually row 2 repeated. After then the cable morphs into a tangle.
Can you have a little go at this for me? It’s just 5 rows of 8 stitches, so it’s not a huge ask. If you’re a leftie even better but it doesn’t matter as long as someone has a go. This is an SOS of frustration!
Here’s the cable pattern. Please don’t ask me to send you the rest of the pattern as I will not – you’ll have to buy it or borrow the book from a library.

20131211-165938.jpg
Thank you! Pennies from heaven if you can help.

Ribbed scarf

20130721-101156.jpg

I’ve enjoyed picking this crochet up at odd times and doing a (long) row accompanied by my audio book, or listening to Aggers and Vaughan gently mocking Henry’s threads of the day, the beery state – or not – of the watching fans and waiting to see if Mrs Aggers has been up on the roof again lately. Anything they say, apart from the actual cricket, is fascinating and strangely soothing. I admit to doing an air punch when we won last weekend. I even might have had a teary eye in fact, but I’ll cry at anything.

20130721-101206.jpg

I’m so pleased with the yarn. I picked it on a spur of the moment – dashing away from the till while the shop assistant totted the total on the back of an old envelope, like they do there. It was reduced to half price-ish and seemed refreshingly different to my yarn choices so far.

20130721-101217.jpg

Crochet rib is cunning isn’t it? Just like its knitted sister it’s springy and creates a thick cosy type of fabric, just perfect for a scarf. I really liked the ribbed square that we crocheted for the 200 crochet blocks CAL earlier in the year. I’m going to keep experimenting with different variations.

20130721-101257.jpg

Do you want to make one too?

Ribbed Scarf

2 x 100g balls of King Cole ‘Wicked’ (shade – 728 – Dye lot – 67886) or any DK yarn

4mm hook

Scarf width 5 1/2″ – length 77″

The scarf is worked horizontally so I loosely chained approx 371 stitches to make the length I wanted. Periodically I stopped and draped the chain around my neck. I prefer long scarves that I can wrap around my neck once or twice but obviously you can make yours shorter by making fewer chains.

Foundation row: Half-treble (UK) into the 2nd chn from the hook. HTR into each chn to the end. Turn. (Sip a G&T – it’s been a fiddly job.)

Row 1: Ch 2, HTR into the back loop of each HTR from the previous round to the end of the row.

Row 2+: Repeat row 1 until the scarf is the desired width. (Or in my case until you run out of yarn!)

+++ If you HTR into the back loop the rib looks the same on both sides. You can also alternate rows: making a HTR into the front loop on row 1, then making a HTR into the BL on row 2. Repeat these two rows if you want ribbing on just one side.

20130721-101434.jpg

Take it easy and crochet this in shortish bursts as it takes a while to do a whole row. I found it left my elbow a bit wincey if I did too many HTR at one sitting. If your hands are getting tired then stop and give them a good wiggle. Be prepared to be mocked though – I was standing over the sink (for some reason) “Why? Why are you practicing starfish shapes with your hands? Is it for casting spells at the witch Olympics?”
They just don’t get it, do they? So silly, just so silly.

Shell Scarf

20130401-163846.jpg

20130401-163931.jpg

I finished this warm woolly scarf for Mum yesterday.

Here are the details:

4mm hook

Lang Tosca Light DK 55% wool, 45% acrylic yarn

Weighs 149g

76″ long & 81/4″ wide

Pattern Vogue Stitchionary or here *NB: pattern is in US terms, if you use UK terms you’ll be crocheting trebles*

I chained 48.

20130401-163949.jpg

20130401-164006.jpg

20130401-164032.jpg

20130401-164057.jpg

Little Christmas Stockings

Hello again,

I’ve been crocheting these sweet sparkly little Christmas stockings for a while, filling them with mini candy canes to give as little gifts and maybe I’ll hang some on the Christmas tree next weekend too. When they catch the light they’re all glinty and pretty.

20121216-140636.jpg
You can find the pattern on Le monde de Sucrette’s blog.

It’s a really easy pattern and I can whip up a stocking from start to finish in less than an hour.

Playing with new stitches

S: “It’s a fine example of skill, I’m just not sure it’s a fine example of scarf”

M: “That’s really different, I like it! The green is lovely”

R: “But is it a bit court jester?”

M: “No!”

S: “A bit”

Court jester and lack of style aside, this is actually not the softest scarf you would want against your face, especially when it’s mostly double crochet as it makes a dense fabric. It feels slightly scratchy. Stylecraft works well for blankets, hats and probably gloves too but perhaps not scarves? (Shame as I have another Stylecraft scarf on the go, but it’s not a dc heavy pattern so might be ok.) I need a gorgeously soft merino type wool to make another version of this bobble scarf. I’ve written down what I did so that’s not a problem, but the purse jangling with coppers might hold the making back a while.

In the meantime I made a cover for my iphone yesterday, using my new found knowledge of spike stitch. It’s my own pattern, which means that it might be a bit dodgy, but for me it’s very early days of designing my own things and you have to start somewhere. Let me know if you try it and if you find a glitch.

Gadget cover

(DC Spike stitch: put the hook into the row below the next dc, yo and pull through, yo and pull through the two loops on the hook. Easy!)

>Chain 13
>Dc into the 2nd ch from the hook and to the end of the chain. (12 dc)
>Ch1 then dc into each dc – repeat this row three times
>Change colour (I didn’t cut off the yarn, I just carried it up the side and picked up the colour as I figured the strands carried up the side wouldn’t show when it was made, and they don’t, so there wouldn’t be huge lots of darning) and work alternating spike stitch then a dc along the row
>Dc into each st of the previous row – repeat this row three times
>Change colour and do another row of spikes, I alternated mine so they are staggered with the previous row’s spikes but you could do them above the others
Carry on the pattern until the strip is long enough to fold over your gadget, I did 14 stripes
>SS across one top edge to make it a bit thicker then dc the sides together with the ws together (I like the dcs on the outside, but you could sew yours up inside out or, or dc it rs together if you don’t want to see them)
>Turn the cover inside out, cut the wool to leave a long tail to use to dc the other sides together, thread a needle and weave the end through stitches at the bottom of the cover
>Turn it back the right side out and dc the other two edges together
>SS along the other top edge, fasten off and darn the ends in.

Finito!

~~~~
What are you making this weekend? Crochet, sewing, knitting, cooking etc etc? I love to know as I’m basically a very nosy person.

Crochet OFSTED?

I’ve undone and re-crocheted block #1 (of the Stylecraft practice set) because I had a message yesterday saying that the reason it was smaller in size than the babycashmerino block was it had 12 rows in the first half, as opposed to -the correct- 13. Oops! Once I know there’s a mistake or something wrong, it will bug and bug me until I have to do something about it.

The funny thing is that the new and improved block is the same size as the version before, and still the same (smaller!) compared to the other DBBC block. I think it’s due to the fact that although the yarns are both DK one is definitely thinner and more wiggly than the other, plus I’m using a 4mm hook with the babycashmerino, versus a 3.5 mm hook for the acrylic. I’m honestly not at all worried about the differing sizes and I wouldn’t mix the two types of blocks anyway; it would be like using margarine and butter in the same sandwich. ;-)

Oh well, maybe I will get a ‘satisfactory’ rating from The School of Crochet OFSTED team but I don’t care. This is a fun project to practise and improve my skills, while learning new techniques.

Sorry for writing the most boring blog post ever! Xx

20120905-183120.jpg

Week 1: CAL Blocks #1 #2 #3

I was really keen to start crocheting something new, so I crocheted the first 3 blocks last week. I was feeling a little apprehensive about how long they would take me to accomplish, since I am probably only at an intermediate crochet level at this stage. Will I understand the patterns? Will I master bobble stitch (block #4 uh-oh) spike stitches and the dreaded popcorn which always makes me nervous for some reason, although I’ve never actually tried making one. They’re probably a cinch? I’m also between projects because I’m meant to be darning in all those pesky ends of the Rhubarb Ripple and the Target Squares blankets, but my fingers get itchy if I don’t do any crochet for a day or so.

CAL Resolution: I’m going to darn in every single end when I’ve finished a block before I begin another. Darning is fine, but not 1000 ends at once which holds up the exciting final stage of joining or edging.

Have you made any CAL resolutions? Go on, spill if you have – I’m so nosy.

Here goes then….

#1 Triangle Stripes

#2 Tiny Textures

#3 Square Target

It was all going so well with #1 until the decreasing rows

If the paper can stay this is fine!

Redo – carefully! Counting is the answer.

Stylecraft special DK (SSDK) 6″ square-ish!

Debbie Bliss baby cashmerino (DBBC) Bliss indeed! My first posh wool, it’s so soft to work with and the stitch definition is amazing. Compare block #2 SSDK & DBBC
This is 6.5″ square using a 4mm hook

Oh fudge! I thought this was a perfect first attempt. The needle highlights where the error began

Second try. Ohhh! Spot what I’ve done? (Ignore the tape measure) I added an extra row for this block to try to square it up, then decided to stick with the written pattern for the next attempt (I swear there is one more row in the pictured block in the book…)

HURRAY! Third time lucky
SSDK 3.5mm hook 5.5″ square

Debbie Bliss Baby Cashmerino: 4mm hook 5.5″ high & 5.7″ wide
This is my patch of marigolds

SSDK 5.5″ square

The outer pink is darker than shown – photo taken under the apple tree so the sunlight was dappled

Pleased and a bit proud of myself, mistakes and all it’s been good fun

The plan so far:
>I’m going to carry on using the two hook sizes for the two yarns.
>I’m not going to stress about the differing sizes as there’s blocking, which I’ve never tried but is meant to work like magic, also some clever soul suggested using the larger blocks for one project, the smaller ones for another.
>I’m just going to enjoy the challenge of crocheting the blocks and decide what to make out of them later.

:-D

PS:: I’ve found out a mug of earl grey tea on a lap-top does not reach a happy conclusion. Just to let you know in case you’re breezily sitting with your drink right there…. DON’T!

New crochet books

My books have arrived! I won them in a blog giveaway by Erin Bassett

I never usually win when I enter prize draws, raffles or lotteries but I’ve received two prizes in a week! Woo hoo!

It was hard trying to pick my favourite patterns to show you but I narrowed it down to the sunflower from the crochet flowers book, and the log cabin block (love this!) and paisley motif from the Vogue crochet stitchionary.

What is immediately impressive about both books is that they have written and diagram patterns; so although the stitches are in USA crochet terms they are easy to use whatever you are used to. Plus it should get me used to the symbols as well. I still have my Japanese and Chinese crochet books to play with at some point.

I’ll be back on Tuesday with the results of the CAL theme vote (still getting votes every day!) and a link you can put on your blog if I sort out the technology.

Happy (bank holiday) weekend everyone!

20120824-132233.jpg

20120824-132240.jpg

20120824-132246.jpg

20120824-132252.jpg

20120824-132258.jpg

Little star

Having a little play with a pattern in Mollie Makes magazine, issue seventeen. It’s from Cute and Easy Crocheted Baby Clothes by Nicki Trench, though I sense possibilities for the huge festival beginning with C (or X for some!)

20120820-100757.jpg

Happy days

Ooooh a lovely day today; flowers and thank you cards from school as its the end of the academic year tomorrow, and one of my lottery winnings (£10!) gift to myself has arrived.
It is good to give, but even better to receive!
It’s been one of those super weeks in all kinds of ways. Hope it has been a satisfying one for you too.
Have a good Friday and a lovely weekend. I’m off ooop north ish to catch up with friends and check out the shops.

20120719-180611.jpg

20120719-201904.jpg

Practice

I wanted to crochet something quick and bright using the recent Let’s Get Crafting Knitting & Crochet yarn the other evening, so I dug out an older edition and made this bag. This was the -almost- finished version with two identical sides double crocheted together. (I obviously also did another row compared to the pattern.)

20120708-110021.jpg

It was good to practise because all the the stitches are double trebles, which I haven’t really used since making the chunky seashell scarf, and a few for the garland (which I’m told is now hanging in baby Alice May’s bedroom along with one of the crocheted birds, see 14th January post – sorry but the linking thingy here is not working today.)

It was fun to use the bright colours and practise ‘that’ stitch again, which incidentally is dead easy, but I baulked at actually crocheting a handle and making it up. Recently I’ve been thinking about what to do with what I make much more. I started the 100 ch then frogged it. The ‘bag’ is now a bunch of small balls of brightly coloured yarn on the bed in here; The Little Room.

I told you it was practise. ;-p

EDT: I realise that my widgets have slipped – oh the horror! – but I’m waiting for WordPress Support to get back to me on the issue. I think I have gremlins!

Summer Flower Garland

I planned to make this garland as a quick easy project, a break from crocheting the mega Rhubarb Ripple and Spring Flowers blankets. I saw the pattern in my crochet magazine last weekend, started it last week and finished it on Saturday, basically that was in two sittings. It’s fast, easy and satisfying to create.

I’m not entirely sure what to do with it. The Little Room already has bunting, a bird, three jars with crocheted jackets and Gilbert the owl, oh and the Yorkshire blanket. Less now is probably more; otherwise I might start having nightmares about waking up wrapped in crocheted strips, a big mummified crochet addict. I might send it to Alice May, I bet her creative Mummy could make a mobile or attach it somewhere to hang prettily.

If you like this and fancy a go at your own then grab a copy of Let’s Get Crafting Magazine for the pattern. I think it’s a goodie.

Red White & Blue

The Queen’s Diamond Jubilee (60 years! What a woman!) and London 2012 Olympic Games are rushing towards us now. Currently the torch is travelling around the country, being passed from hand to hand. This morning I’ve heard that it’s in Wiltshire, and was being carried part of the way by a woman who has raised a lot of money for charity. It’s really good that non-celebs/sports-people are having a turn and are honoured for their service to the community or whose talents are recognised.

For the past while I’ve been taking a few of these types of pictures…

This is a road in Oxford in case you’re wondering.

And, the next one made me smile!

Creative display methods reflecting the times eh?

So the shops are getting well on board, selling anything and everything red, white and blue. With a fair few Jubilee biscuit tins etc. Good for them! I like to see it.

On another track, I walked (a 3.3m round trip – loving Endomondo sports tracker!) to a library on Monday and discovered they have a host of craft books on all sorts of the topics including: quilting, patchwork, jewellery, knitting, cake decorating….and crochet…a reallllly good selection of crochet books. So I grabbed five randomly and took them outside to sit in the sun (yes! we have sun now…hurrah!!!!!) in the quite beautiful library garden. Next time I go maybe I’ll take some photos, it’s full of clever planting, with benches placed at intervals in the quiet corners behind plants, trees and sculptures. The benches are painted a lovely blue, you can see the colour behind the books in the photos, which really works with the setting.

The Dudes book has some very nice jumpers in it with a variety of sizes. I ‘might’ have a try at something wearable later in the year. And no; I’m not ‘a dude’ but I did like the look of the solid, chunky clothes unlike lots of crocheted items for women which are often all holey and not really flattering to actually wear. Unless you’re a willowy model IMHO. The male models are pretty yummy too in this book – some of them – so that’s definitely a recommmeded ‘book to browse’ from me!

I made some notes on which patterns I liked in the books as I went, so I can go back and borrow a few at some point. There are even more to go and peruse some other time too.

Thanks to blogger Jill from Nice Piece of Work for commenting on my charity shop book at the weekend. She prompted me have a look for craft books when I was returning a novel (Lost Lady -Willa Cather, recommended read particularly if you like classic American fiction.)

I’m off to walk around the grounds of a Palace now, will post some pics soon.

Enjoy the sun, if you have some wherever you are. :-D

Twit-too-woo

I’ve felt like crocheting something small again for a while as the bigger projects of blanket making have taken over recently. This owl purse pattern is one I’ve had in my folder for a while; so I decided to have a go at it this morning. I didn’t expect it to be so fast to make, so here is the finished item!

He measures 10 x 10.5cm, just to give you an idea of the dimensions. I used a 5mm hook – again for a change as I’m using a 4mm for both blankets and like a leetle variety in life. The yarn is pretty coloured acrylic from yesterday’s Let’s Get Crafting magazine pack.

For now Gilbert is in place on the board in The Little Room just so I can look at him when I’m in here. Sorry this is the best of several fuzzy photos, the light’s not good in here today.

Here’s the link to the pattern I used (you’ll spot the bits I left out!) by Mama G’s Big Crafty Blog

:-D

Sunny Days

I’ve been taking advantage of the beautiful weather we’ve been having lately.

I even had to move into some shade, it became so hot!

And ironically I’ve finished the chunky seashell scarf! I’m sure I’ll need to use it soon enough though…

Details:

Pattern is from Nicki Trench: Cute & Easy Crochet (see books link on sidebar >>>>)

James C. Brett Marble Chunky acrylic yarn

Used 245g (Balls are 200g 341yards/312m each)

9″ wide

67″ long

Made 26 ch (inc turning chn) for 4 seashells width

54 seashells in length

6mm hook

————————————–

I’ve also made a few more of these…

Part of me sometimes wonders if crocheted jar covers are a 21st C) version of the 20th C) poodle bottle covers and Barbie doll dress toilet roll holders?! But I have an idea for another one so I’m carrying on crocheting.

I made this with Planet Penny Cotton and am really happy with the colours. It’s my Peach Melba jar cover.

It’s good to see that these little blankets are being put to good use!

Crochet as a meditation

Bingo!!!

I was really hoping that the blogger who wrote the post I referred to yesterday, about how to turn crochet into a mindful meditative activity, would post a link.  I’ve received quite a few comments expressing an interest in reading about the subject, but just couldn’t remember where I’d seen it….

Thanks Jess of  JP’s Crochet Blog for reminding me it was yours.

Also, for my own interest I’m reminding myself of Jess’s useful page on reading reading charts.

:-)

Goldilocks and the Seashell Scarf

I’ve crocheted another few rows in the brightish light of the morning. The trebles of the Rainbow Granny Stripe blanket are far easier to do when it’s night-time. I’m even able to glance up at the tv now for a second or two. I’m not nearly as good as my friend whom I first met at a convention last autumn. She was looking at the speaker all the time, but her hands were busy beneath the table crocheting! I was in awe and definitely experienced a good measure of wonder too!

She’s clever with beads too, her pendant was featured on the cover of a UK jewellery magazine recently.

Anyway, I’m losing focus as usual, the main point of showing more Seashell Scarf pictures is I’ve hit a snag. A big one. I looked at the ten rows of seashells and realised it’s too wide. (14″) I’m not actually going to wear the scarf that thick!

I know; it’s like a soap opera now. First I can’t do the dtr and wail, then it’s too narrow with chunky yarn, and now it’s too wide. This is like a version of Goldilocks for beginner crocheters!

Before I undo it all (all those dtrs!!!!) I’m going to consider if it can be used for anything else. I wondered if I could make ten row ‘squares’ and fix them together to make a throw, but will the edges be too wibbly and fragile to do this? Meanwhile I will start another using the second skein of yarn. I’ll try either 26 or 32 ch to begin, since my advisor Caryn has worked out that you need 6 extra ch per shell. Four shells is probably the best width, three was too few, ten is too many. Fingers crossed.

A surprise in the post from V cheered me up in the midst of scarf trauma. There are some good stories about the mice in the cottage. I’ll tell you about the Christmas mice sometime.

These Woman’s Weekly pages look vintage don’t they? (We don’t seem able to say old these days, it’s all ‘vintage’. As I’m apparently a kool-crochet-kid according to Patch I’m going with the flow.)

In fact that the pages aren’t really that old at all. :-)

Thank you V for thinking of me. I love little surprises in the post.

Flowers & Seashells

Yesterday I was road-testing the flower key chain pattern for Adrianne of Teeny Weeny Design and trying to get over a streaming cold, so crochet in bed was in order.

Imagine my horror when I realised that the petals were made with a combination of dc (fine) tr (not an issue) htr (quite like them) and dtr (EEEEEK!)

The dreaded dtr and me have a bit of recent history as you might know. I even started a little dtr SOS thread on Ravelry. People there are sooo helpful and knowledgeable. If you want to ask anything crochet or knitting related there’s where you need to head right away.

I watched a very short and simple YouTube video, then got on with trying them again. They are not a problem with cotton! Not an issue at all!

I’m now waiting on the next set of instructions so I can carry on with the leaves and finishing off. I’ve taken my job seriously and emailed some suggestions for the clear translation of English terms etc. It’s been really fun!

*************************************************

Today I have mastered dtr with chunky yarn too.

:-D :-D :-D

I’ve had a quiet morning sitting in the sun having a second go at The Chunky Seashell Scarf that I tried a week or so ago. The dtr for some reason are not a problem now!  This new found ease must be from yesterday’s petal practice. Perhaps doing them with cotton gave me confidence to try using the more bulky chunky yarn and big 6mm hook?

Want to see? (Sorry, I’m being a bit naff-twee…as if having a crochet blog wasn’t twee enough ;-))

I’m off to The Little Room now, back into the sunshine to practise a few more dtrs -my tension needs to be consistent – while I recoup some more energy for the rest of the week ahead. A friend has given me a couple of Bollywood music cds. Fab crochet-while-chair-dancing about to happen!

Feel free to tell me what you’re working on at the moment, I love a poke around online into others crafty blogs and websites.

A wealth of talent

Morning!

Have a look at this little lot, there are some really interesting patterns. I favour the granny squares and triangles nearer the bottom of the page best.

However I need to learn how to read symbol diagram patterns before I can try any. In person with someone else pointing at the beginning place would be best. It’s far easier when you can ask questions and learn alongside another. Anyone in Southern England who fancies having a keen pupil?! Failing that can you recommend an instructive blog/website/book please?

I found the link for the above site on Aunty Mum’s blog by the way. :-)

Also I’ve been meaning to share the link to this blog for ages; purely for the name ….oh what an original name! It really made me look twice when I stumbled across it.

Thank you for your tweets and comments on my I’m-so-poorly post yesterday. I am beginning to feel a bit more human but still don’t feel like talking much today…that’s a sure sign I’m unwell!

I’ve got to perk up actually as I’ve got crochet homework to complete soon! I asked Adrianne of Teeny Weeny Designs if I could have the pattern for her flower key cover as I have a stash of cotton and want to use it on nice projects. Adrianne’s written it up and asked me to road-test it as an English crocheter…exciting! Then she will make the pattern available in her Etsy shop.

Here’s one Adrianne made earlier….

Beautiful isn’t it?

Sunday shopping

Tea, coffee & sugar?

Buttons, threads & ribbons!

One new sewing box?

Three new sewing boxes actually!

Sunny day today hey? ;-p

Well…you can never have too many owls, or too many tins in my opinion…

Download this free really useful guide if you are into making the occasional amigurumi crocheted toy (link to Stacey’s website fresh Stitches in my sidebar.)

Guess what I’m making…?

Made with cotton!

“At last!” I can hear Penny shouting :-)

You can buy the pattern for this cute little owl here. It requires a little bit of brain power to translate the pattern into UK terms. Also the translation is slightly eccentric at times. BUT I’ve made an owl and this is my first attempt, so it can’t be too tricky!

I enjoyed using the cotton to embroider the beak, it will work very well as thick sewing thread too.

Look at my gifts from Hong Kong! (One Chinese, one Japanese…)

Aren’t the gingerbread men gorgeous?!!!!

But oh my goodness; how do I read the charts?

Obviously I start at number 1….?

Then what do the in and out arrows mean?

The stitches are demonstrated in line drawings (very teeny at the back of the book) but with no English translation. However I do enjoy a challenge and am determined to learn how to read these tricky symbols. I actually have a suspicion they might not be as tricky once you get the hang of them either.

One page has a line of scissor motifs joined together in a line – super fiddly but very cute!

And finally, because it’s my blog and I can!

The pile is slowly growing. I’m doing an alternative granny square when I feel like it doing something small. It does seem to mean that I have to play back sections of DVDs again, because I can’t look up at the screen as much as when rippling or granny striping. I miss visual clues as to what’s happening! Life’s hard isn’t it?! ;-p

Those edges :-D

Foiled by dtr…

I didn’t exactly plan to but yesterday I ended up wandering somewhere I hadn’t been for quite a while, after tootling along in my little car glancing at lush green fields and daffodils opening on the roadside verges. When I got to a quaint market town about 15 miles from here I made a beeline for the posh yarn shop, but got distracted by a kind of ‘everything you could want and plenty you don’t need’ shop. This is where lots of items are priced at £1-1.99 and you get lured in by the cheap, cheap prices then end up spending at least £10.00.

That might have been me….

BUT in my defence I have been wanting to make this scarf from the Cute and Easy Crochet book (see link in the sidebar) and it’s rapidly becoming Spring. So obviously I need to crochet it quickly, and for that I need yarn. (Still surpressing a shudder, but again I can’t in all honesty call it wool. It’s 100% man/woman made…)

I think it will be lovely in pink. Debbie Bliss Como isn’t made anymore and this pink marble chunky is 200g for £4.99. Of course I didn’t plan to end up in the market town or the ‘everything you could want and plenty you don’t need’ shop or buying yarn. So wasn’t sure how much the pattern called for. I bought two just in case, you understand?

Umm and also a ball of this….

…for an Easter thingy or two I’m planning to make.

Last night when I tried to start the scarf I found that Como is/was obviously even chunkier than chunky; so had to work out doubling the initial chain and pattern as it should have been about 10″ wide and mine was 5″!

The next pit-fall was dtr, what’s hard about trebles?

Nothing. I can confidently say.

But double trebles are a nightmare!

I had thought I’d progressed to intermediate, rather than a beginner crocheter – but oh my goodness those double trebly things have finished me off!

The 2yo thingy ended up all twirly around the hook; that’s when I could get 2 yos without one slipping off altogether!

I have asked about this dtr thingy on Ravelry and see I’ve helpfully been given some links to online videos.

Watch this space for progress…..

Aren’t these violas lovely? Such happy little faces when I return home. There are tulips coming up in amongst them and they were a complete surprise.  I’m waiting to see what colour they are, when they open.

Have a nice evening/day/ now I’m off to see The Woman in Black at the cinema with friends. The book scared me, the play scared me, maybe I’ll be brave for the film?!

:-)

Alternative Granny

I saw this blog post and absolutely loved it…. I especially like seeing the edges. I love the little Vs on the edge of crochet! I really do!

When I tried using Jan Eaton’s target square pattern in her book I came a cropper with the 7 ch bit, the square was a wibbly mess. (Practise makes perfect and all that, but the * and ** and repeats instructions for this square are really confusing to a bear with little brain like me.)

I saw this pattern on CrochetQueen’s blog.

Then I tried to crochet my own AG square using the pattern, but got really confused; mostly about what to do with the 5 ch. There were holes where there weren’t meant to be holes!

I wailed to CrochetQueen that I needed help. She added some tutorial pics to her pattern in about a day. What a star!

How helpful is that?

The generosity of other bloggers in giving patterns, advice and free tutorials is very much appreciated. Maybe one day when I’m more proficient I can do the same? It would be nice to pass it on….

So anyway, using CrochetQueen’s pattern and photo tutorial here’s what I’ve come up with so far…

I know I’ve basically posted the same photograph again and again and again, but I do LOVE those edges!

I used a 3.5 mm hook because I’ve realised my tension on granny squares is always a bit loose and they looked too wibbly using a 4mm.

The yarn is Stylecraft Special DK from my pack bought from here.

While I waited for these photos to load I’ve had a think about trying a slight variation on the number of trebles in each round. I’m going to have a little play again later.

Yesterday afternoon I looked out of the window to this, they really make me smile….

Can you see it? :-)